
21 Short Nail Designs for Beginners That Are Easy to Do at Home
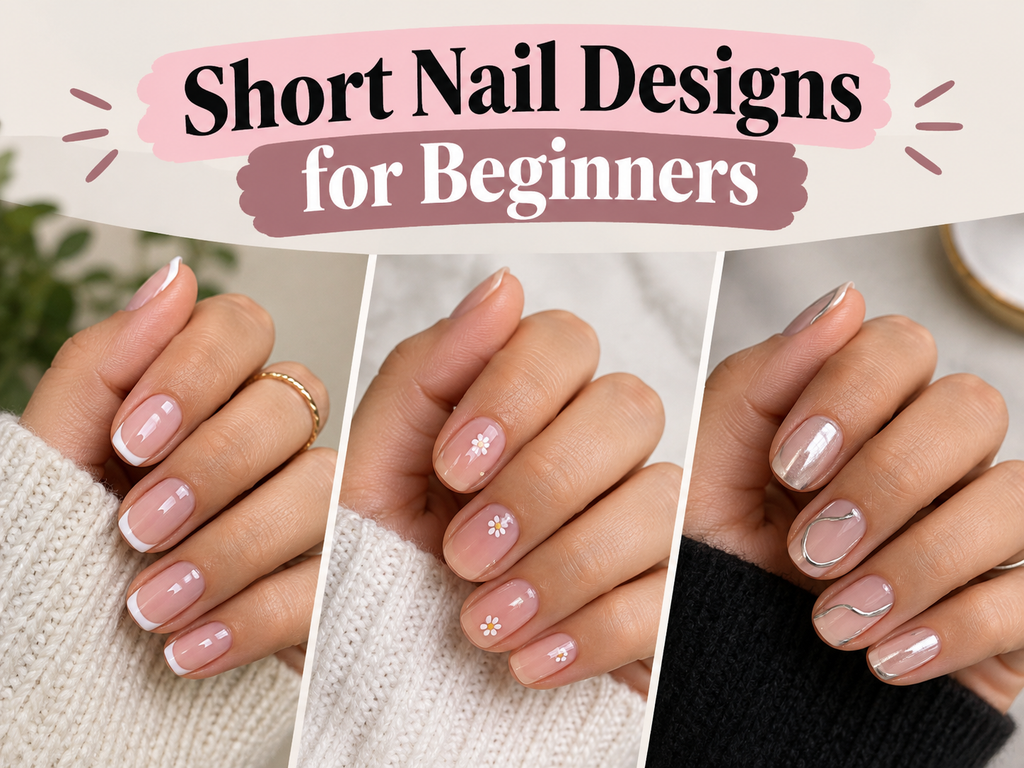
Short nails are having a strong moment in 2026, and you don’t need long extensions to create a manicure that looks polished. Micro-French tips, tiny dots, sheer finishes, small flowers, chrome accents, and negative-space details all work beautifully on a smaller nail surface.
For beginners, short nails can actually make nail art less intimidating. You have less surface area to cover, and many of the prettiest designs rely on small, simple details rather than complicated artwork. With a few polish colors, a dotting tool or toothpick, a fine brush, and a little patience, you can create a manicure at home without professional equipment.
The key is choosing designs that match your nail length instead of trying to copy a style made for long extensions. The ideas below focus on short natural nails, simple techniques, and finishes that still look intentional when you’re doing your own manicure.
1. Sheer Pink Short Nails
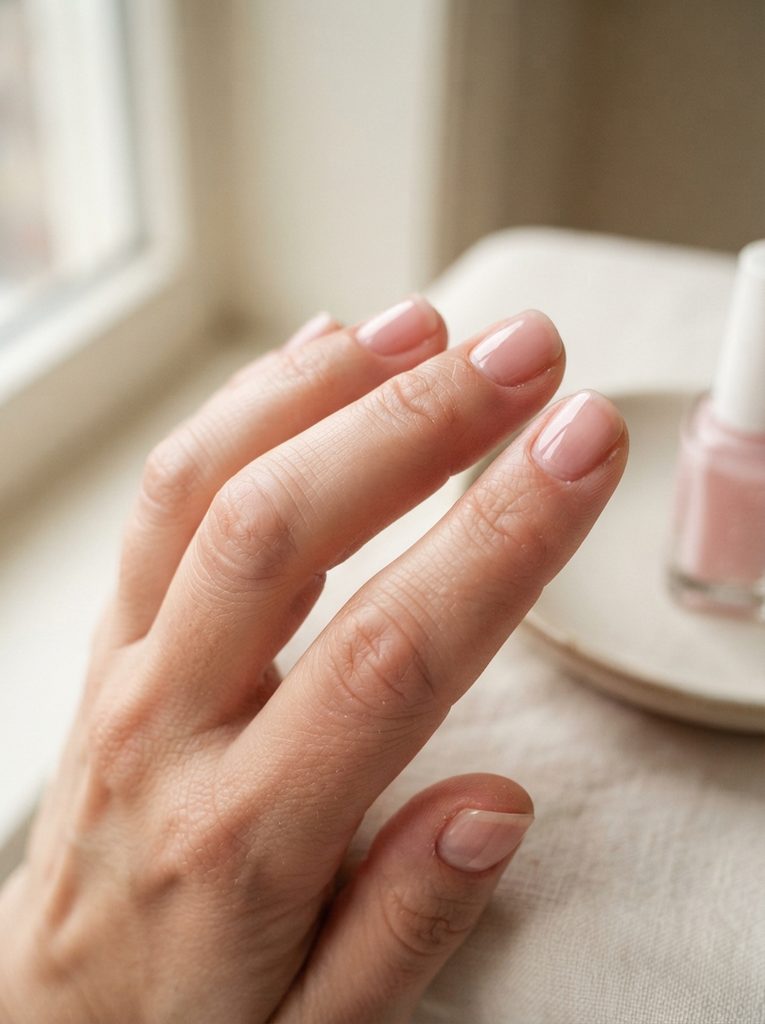
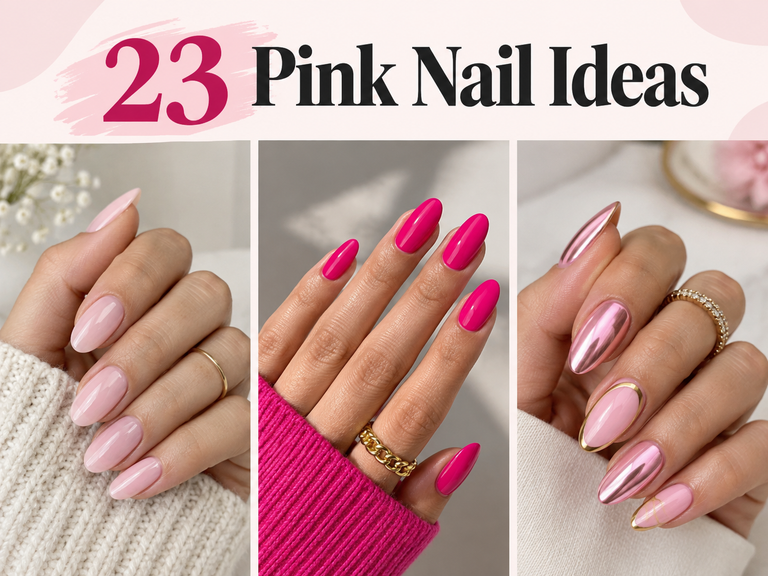
A sheer pink manicure is one of the easiest places to start if you’re completely new to doing your nails. There are no complicated patterns to paint, and the translucent finish lets your natural nail show through.
Choose a soft blush, pink-beige, or milky rose polish and apply one thin coat for a barely-there effect. Add a second coat if you want slightly more color while keeping the manicure natural-looking. A glossy top coat gives the finish a smooth, polished appearance.
This is especially useful when you want short nail designs for beginners that work for school, work, interviews, dinners, or everyday outfits.
Beginner Tip
Don’t try to cover the nail with one thick coat. Two thin layers are easier to control and usually give you a cleaner finish.
2. Micro-French Tips on Short Nails
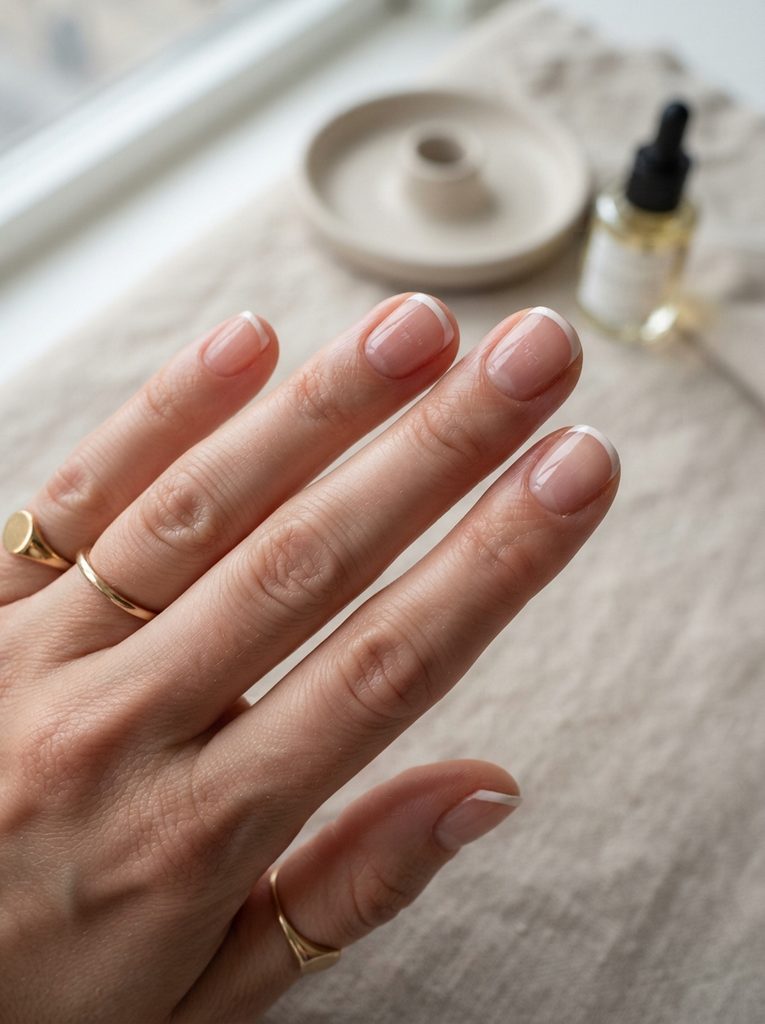
Micro-French tips are one of the best current options for short nails because the design uses only a very narrow line along the free edge. Current 2026 nail coverage has highlighted micro-French as particularly well suited to short natural nails.
Start with a sheer pink, nude, or milky base. Once it has dried, paint an extremely thin white line across the tip. If freehand painting feels difficult, use French-tip guides or a small stamping tool to help create the curve.
You can also replace white with chocolate brown, burgundy, soft blue, sage, or another color for a more modern version.
Make It Easier
Don’t worry about creating a dramatic smile line. On short nails, a tiny curved line is enough to make the manicure recognizable.
For another polished beauty look to pair with this kind of minimalist manicure, you can browse Headband Hairstyles Ideas.
3. Tiny White Dots on Nude Nails
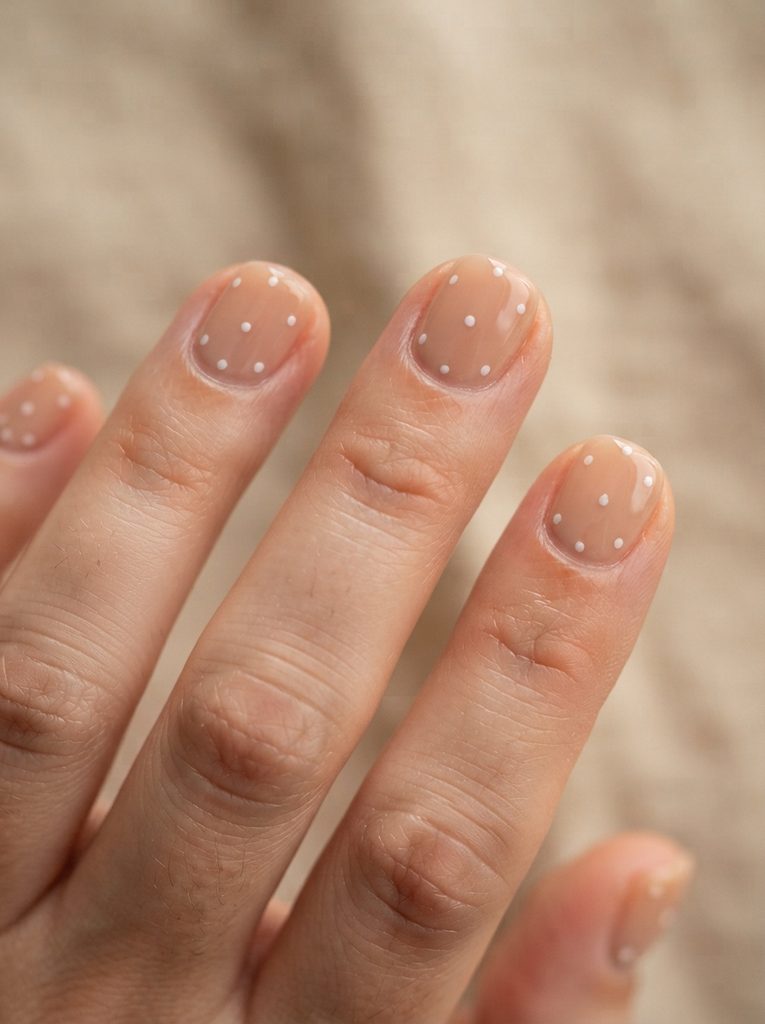
Dots are one of the easiest nail-art techniques because you don’t need to draw complicated shapes. Start with a warm nude, beige, or pale pink base and add tiny white dots near the cuticle, sidewall, or tip.
A professional dotting tool makes the process easier, but a clean toothpick, bobby-pin tip, or similar small tool can work for simple dots. Dip the tool lightly into polish and press it straight down onto the nail.
Try placing three tiny dots together on one side of each nail. You can also vary the placement slightly from nail to nail so the set feels hand-painted rather than mechanically identical.
Keep the Dots Small
Short nails usually look better when the artwork leaves plenty of empty space. Start with less polish on your tool and add another dot if necessary.
4. Milky White Nails With a Tiny Accent
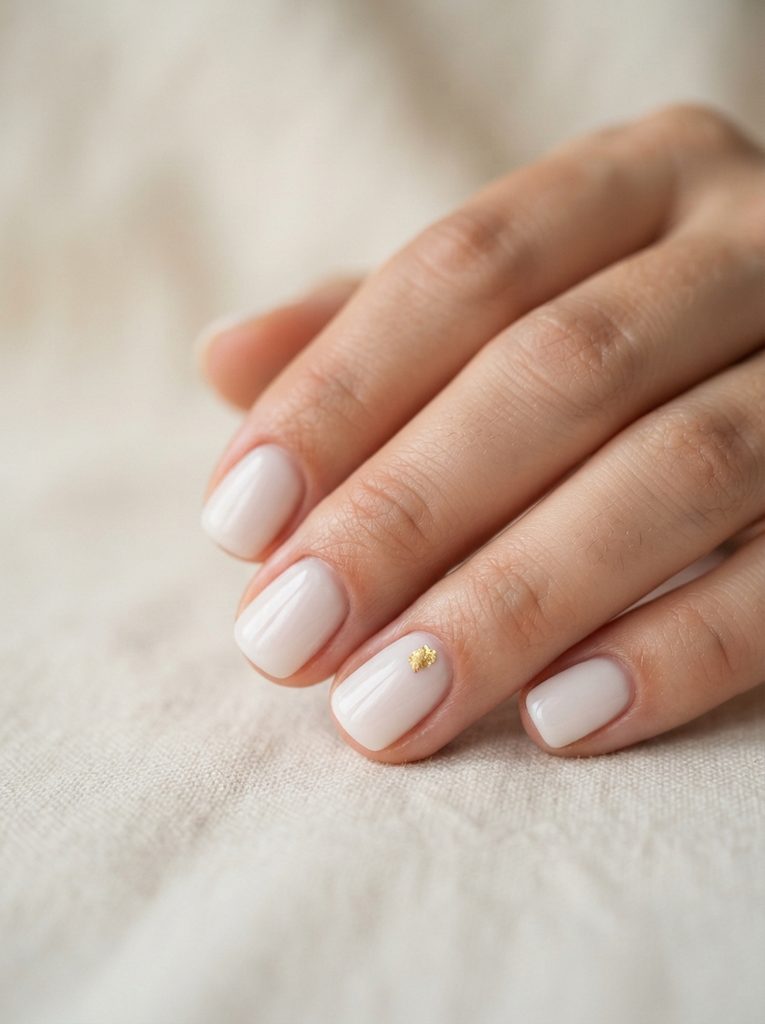
Milky white nails are another beginner-friendly option because the color itself creates most of the visual impact. Instead of covering the manicure with complicated artwork, use the milky base as your finished look and add one tiny detail to one or two nails.
Try a small gold dot, a tiny black line, a miniature flower, or a single pearl-like accent. The contrast between the soft white background and the tiny detail keeps the manicure modern without making it difficult.
Sheer and milky nail finishes remain prominent in current 2026 nail inspiration, making this an easy way to get a trend-aware look without complicated nail art.
Try a Soft Finish
If bright white feels too stark, choose an opaque milky pink or translucent ivory instead.
5. Tiny Hearts on Short Natural Nails
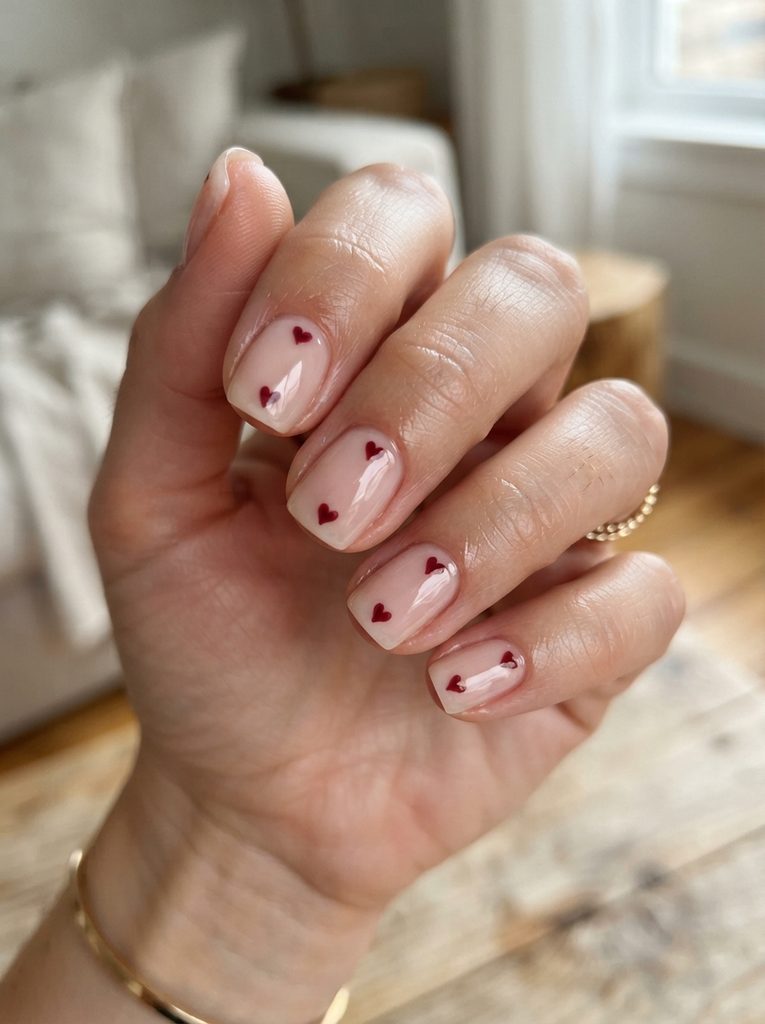
Tiny hearts are simple enough for beginners but still give a plain manicure a playful personality. Start with a sheer pink, nude, or milky base and add one small heart to each nail or use them only on accent nails.
One easy method is to place two small dots beside each other and connect the lower portions into a point using a fine brush or toothpick.
For a softer manicure, use burgundy over blush pink. For something brighter, try cherry red over milky white.
Easy Color Combinations
- Blush pink and burgundy
- Milky white and cherry red
- Nude and chocolate brown
- Pale pink and plum
- Cream and deep red
6. Pastel Micro-French Tips
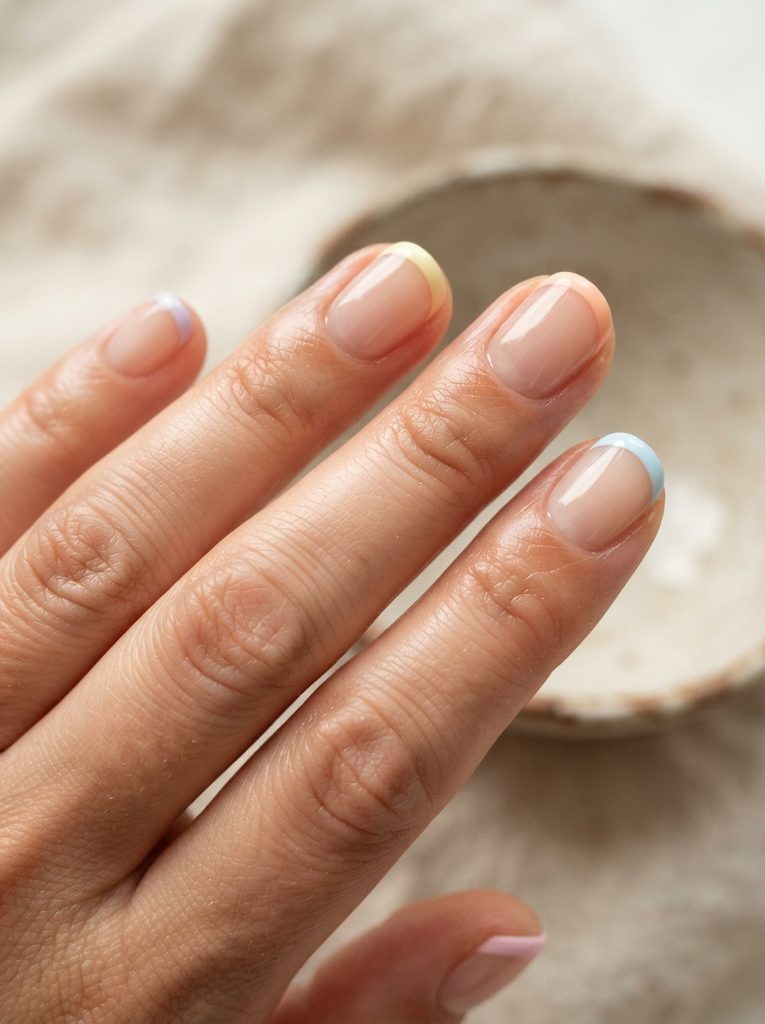
Once you’re comfortable with a basic French tip, change the white polish to pastel colors. This gives you a colorful manicure without introducing a complicated painting technique.
Try lavender, pale blue, butter yellow, soft pink, peach, or pistachio. Keep the base sheer or nude so the colored tips remain the main detail.
Using a different color on each nail can create a playful set, while repeating one pastel shade keeps the manicure more understated.
Keep the Lines Consistent
The colors don’t have to match, but try to keep the thickness of each tip similar. This makes the manicure look more intentional.
7. Short Nails With Tiny Floral Details
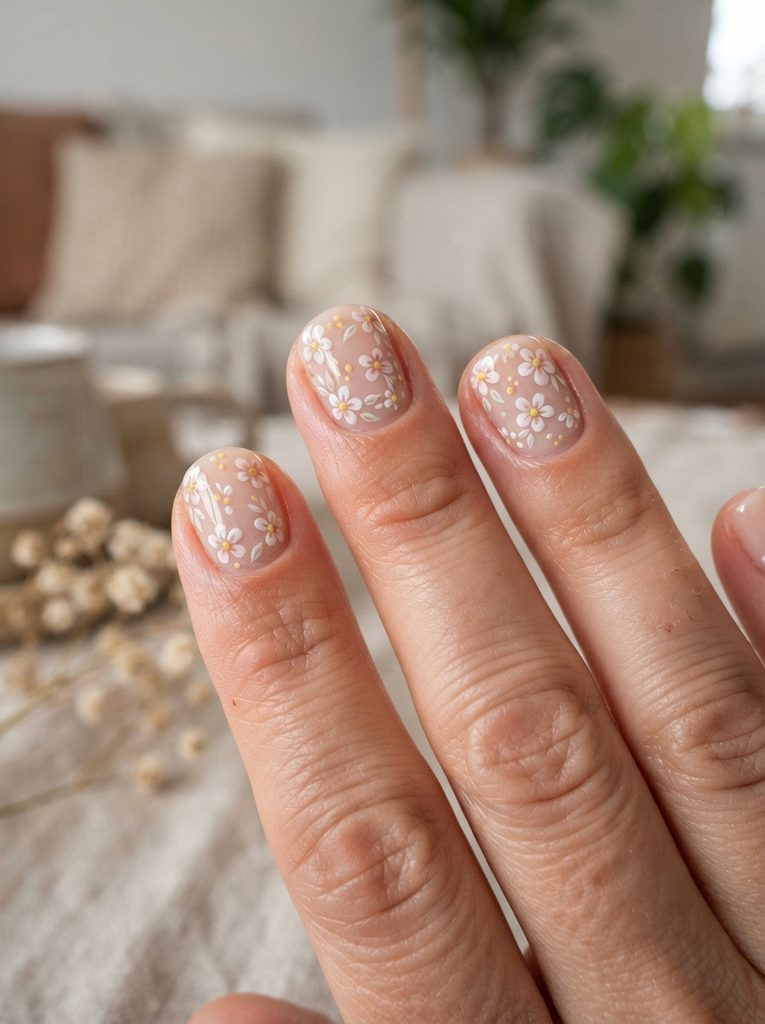
You don’t need to paint a detailed flower to create floral nail art. A tiny five-petal flower can be made from a few dots.
Choose a neutral base such as sheer pink, nude, or milky white. Place five tiny dots around a smaller center dot. White petals with a yellow center create a classic look, while pink, blue, or burgundy flowers give you more variety.
Keep the flowers small and place them on only one or two nails if you’re still learning.
Make the Petals Tiny
Too much polish on the dotting tool can create large blobs instead of delicate petals. Remove excess polish before touching the nail.
8. Nude Nails With a Single Gold Line
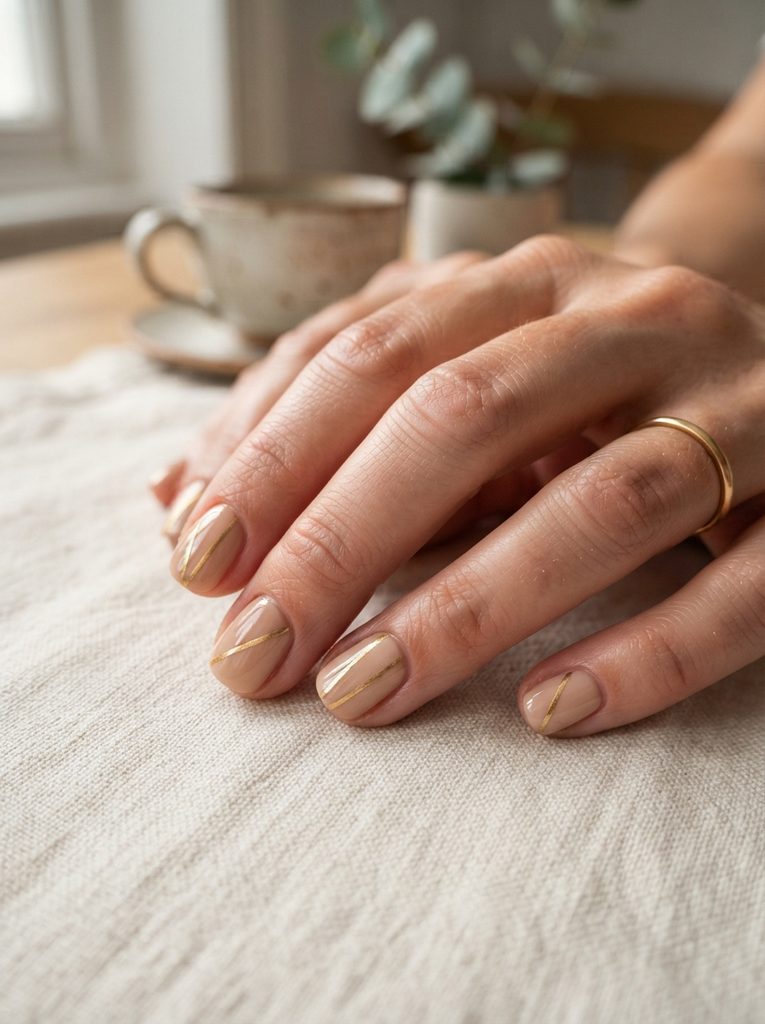
If detailed nail art feels intimidating, start with one simple line.
Apply a nude, beige, blush, or caramel base and let it dry completely. Then use a fine nail-art brush or metallic nail-art pen to create one short gold line on each nail.
The line can run diagonally, vertically, or slightly curved. It doesn’t need to be identical on every nail. Small variations can make the manicure look more natural and handmade.
Choose Warm Neutrals
Gold looks particularly good with warm nude, beige, caramel, cream, and blush shades.
9. Short Nails With Minimalist Black Dots
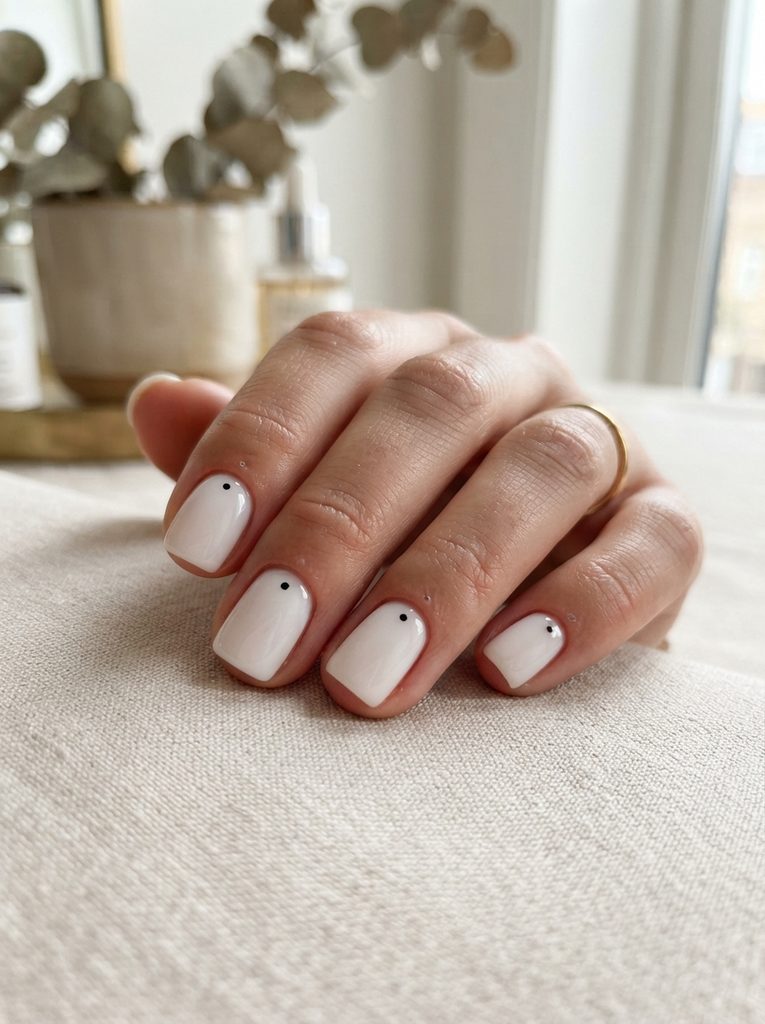
For a more graphic version of dot nail art, pair a milky white or sheer nude base with tiny black dots.
Place one dot near the cuticle on each nail, or change the placement from nail to nail. You can also create two or three dots in a small cluster.
If black feels too harsh, substitute dark chocolate brown. The result will still have contrast but will feel softer.
Leave Plenty of Empty Space
The simplicity is what makes this design work. Don’t cover the entire nail with dots.
10. Matte Dusty Rose Nails
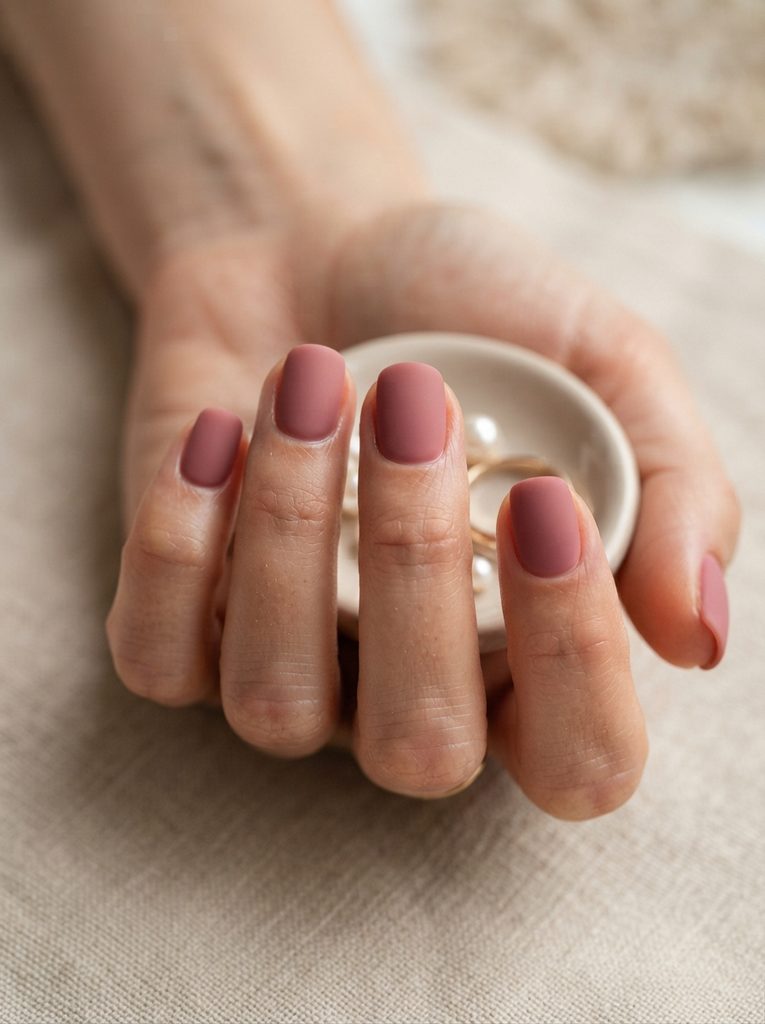
You don’t need nail art at all to create a beginner-friendly manicure. A matte finish can completely change the appearance of a simple solid color.
Dusty rose, muted mauve, terracotta, sage, mocha, and soft lavender are all easy shades to experiment with. Apply two thin coats and finish with a matte top coat.
The result feels understated but polished, particularly when the nail shape is neat and consistent.
Focus on Clean Application
Because there is no artwork to distract from the polish, spend a little extra time cleaning around the cuticle and sidewalls.
11. Short Nails With Tiny Chrome Accents
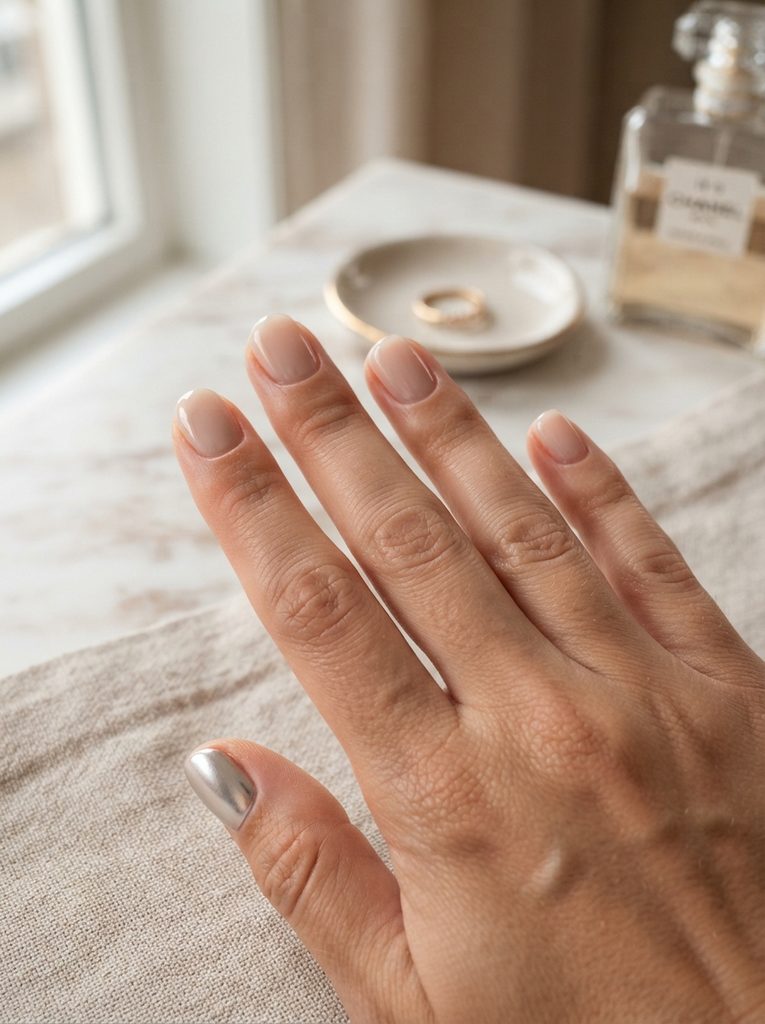
Chrome doesn’t have to cover every nail. A small metallic accent can give a simple manicure a more current feel while keeping the design beginner-friendly.
Start with a nude, sheer pink, or milky base. Add a small silver or pearl-chrome detail to one or two nails. If you don’t have chrome powder, metallic polish can create a similar visual effect with fewer tools.
Chrome and other reflective finishes continue to appear in 2026 short-nail inspiration, including combinations with minimalist designs.
Use One Accent Nail
If you’re new to metallic effects, start with the ring finger instead of trying to make every nail identical.
12. Short Square Nails With Thin White Tips
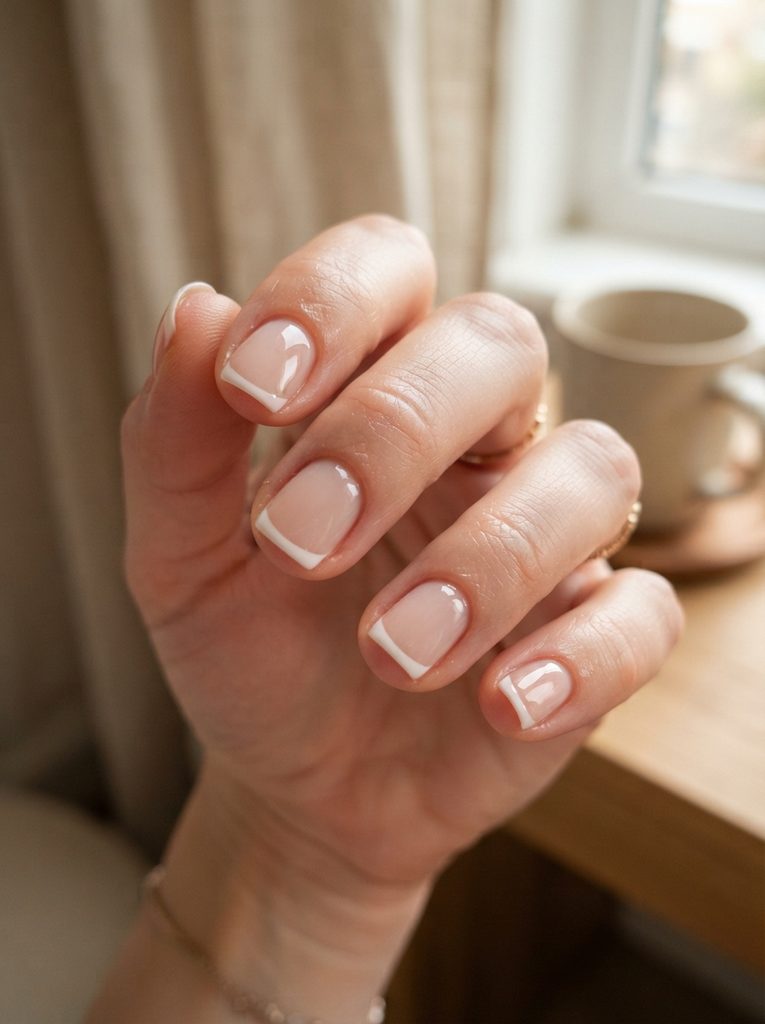
Classic French tips can still work beautifully on short square or squoval nails. The important part is keeping the white edge narrow enough to suit the available nail space.
Apply a sheer pink or nude base first. Once dry, create a thin white line along the free edge.
If freehand painting is difficult, French-tip guides can make the process much easier for a beginner.
Keep the Tip Proportional
A very thick white tip can visually take over a short nail. A thin line usually gives you a cleaner result.
For a complete look for an upcoming special event, you could pair this manicure with Graduation Hairstyles Ideas.
13. Colorful Micro-Dots

If plain dots feel too basic, use several small colors.
Start with a milky white, pale pink, or nude base and choose three complementary colors. You could use pink, lavender, and baby blue for a soft pastel manicure, or burgundy, cream, and chocolate for a richer look.
Place the dots randomly rather than creating a strict pattern. This makes the design easier because you don’t need to achieve perfect symmetry.
Try a Seasonal Palette
For fall, experiment with burgundy, brown, muted orange, and cream. For spring or summer, switch to pastel pink, blue, yellow, and lavender.
14. Simple Negative-Space Lines
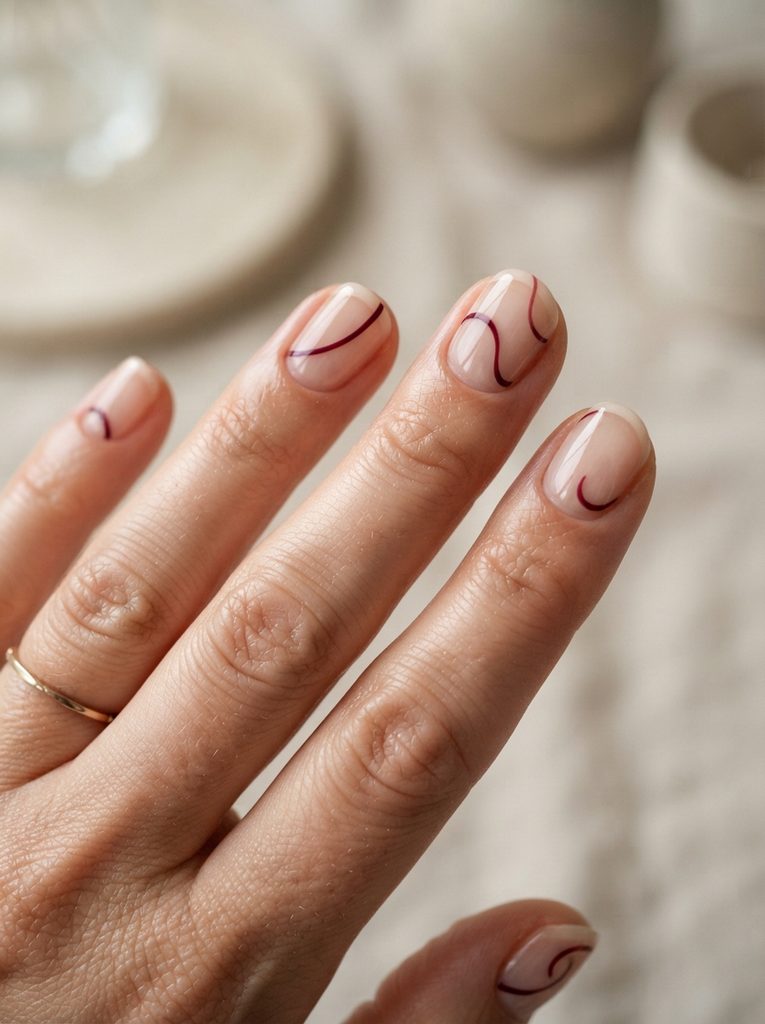
Negative-space nail art can look complicated in photos, but a simple version is beginner-friendly.
Start with a clear, sheer, or nude base. Then paint one thin curved or diagonal line across part of the nail while leaving the rest of the nail uncovered.
Black creates a strong graphic effect. Brown, burgundy, gold, or pastel colors create a softer version.
Current short-nail trends continue to use negative space because the technique gives a small nail surface a clean, modern appearance without covering it in artwork.
Don’t Try to Fill the Whole Nail
The empty area is part of the design. A single controlled line can be enough.
15. Tiny Checkerboard Accent Nail
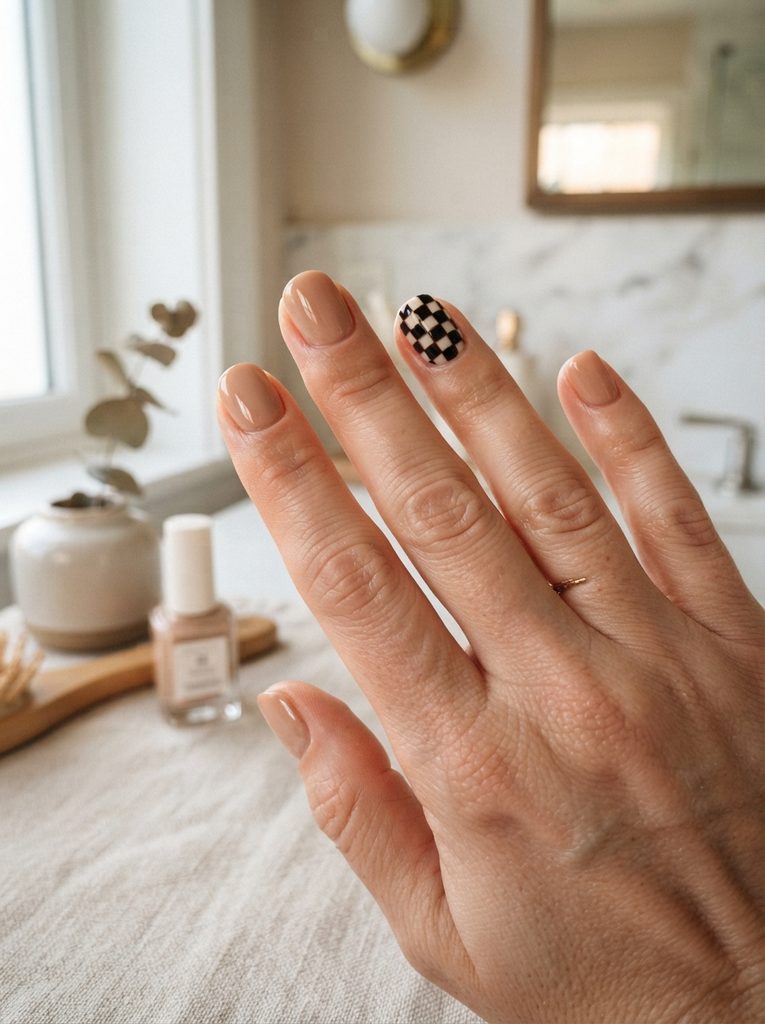
A checkerboard pattern can look intimidating when you see it on long nails, but using it on just one accent nail makes the idea much easier for a beginner. Keep the other nails in a solid nude, cream, or milky shade.
For the accent nail, create small squares using a fine nail-art brush or thin striping tape. You don’t need a perfectly measured grid. Slightly imperfect squares can actually make the manicure look genuinely hand-painted.
Start With One Nail
Don’t attempt the checkerboard pattern across the entire set on your first try. One accent nail gives you room to practice without making the whole manicure feel complicated.
16. Tiny Stars on a Nude Base
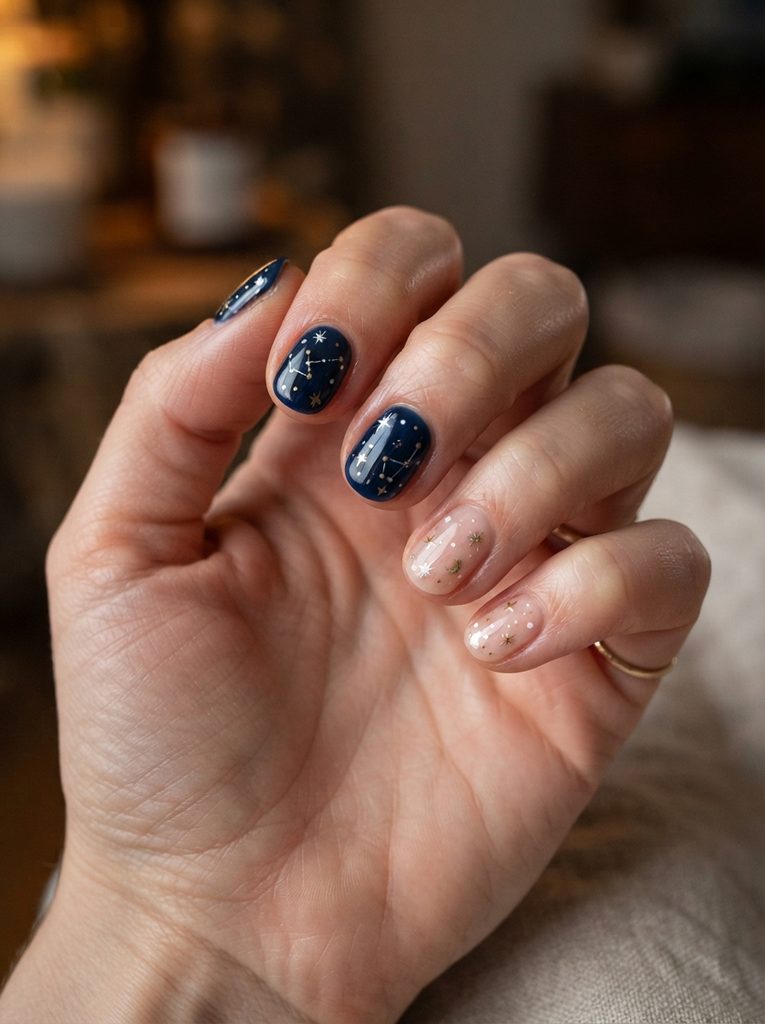
Tiny stars are another simple detail that can make a basic manicure feel special. Start with a nude, sheer pink, milky white, or pale blue base and add small white, silver, or gold stars.
For very small stars, use a toothpick or fine brush to create a few intersecting strokes. You don’t need every star to have five perfectly equal points.
For an easier version, put one star on the ring finger and leave the other nails plain.
Try a Night-Sky Palette
Navy with gold stars creates a dramatic combination, while nude with white stars feels softer and more suitable for everyday wear.
17. Half-Moon Nails
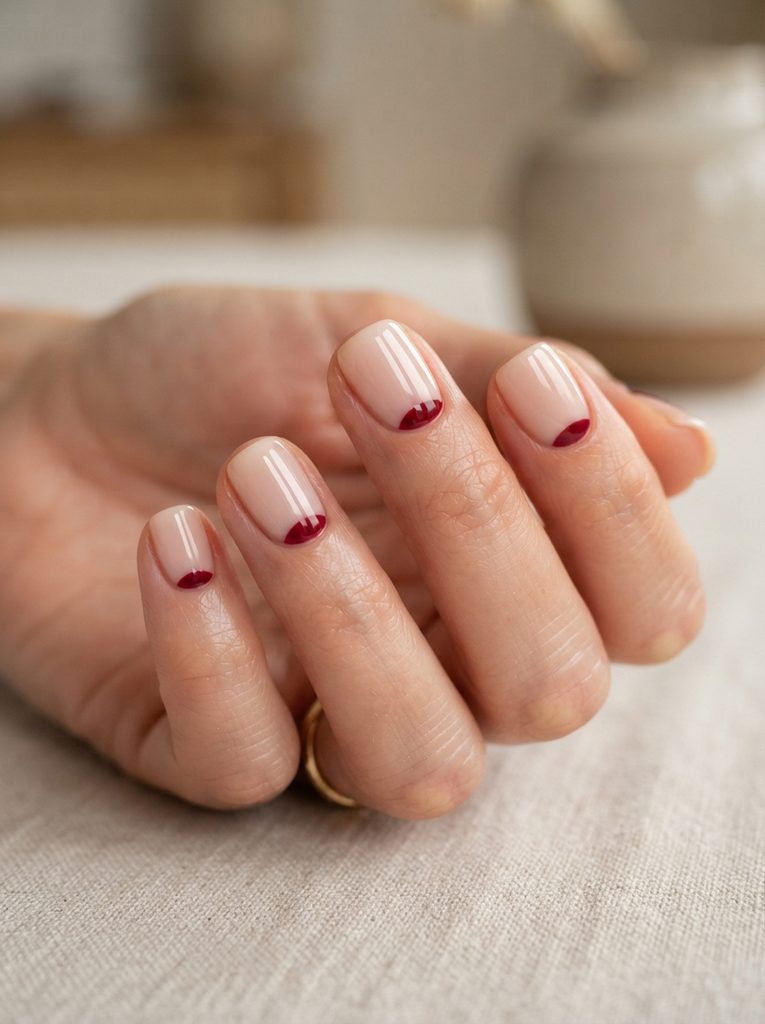
Half-moon nail art follows the natural curve around the bottom of the nail. Because the design uses a simple curved shape, it can be adapted easily to short rounded, squoval, and square nails.
Apply your base color first. Once it has dried, use a small brush or curved nail guide to create a contrasting crescent near the cuticle.
Burgundy with nude, chocolate with beige, or rose with pale pink can create a sophisticated result without complicated artwork.
Use Two Similar Shades
If you’re nervous about creating strong contrast, choose two colors from the same family. The design will still be visible but any small imperfections will be less noticeable.
18. Tiny Colorful Waves

If straight lines aren’t your strength, try waves. Slight imperfections are much less obvious with curved lines, making this a useful design for beginners who want something more creative than dots.
Use a sheer nude or milky base and draw two or three thin waves across each nail. You can keep the colors coordinated or use different shades on each nail.
Blue and white give the manicure a fresh coastal feeling, while pink and orange feel brighter and more playful.
Keep the Waves Thin
A fine brush gives you more control. Don’t worry about creating identical waves. The relaxed variation is part of the look.
19. Polka-Dot French Tips
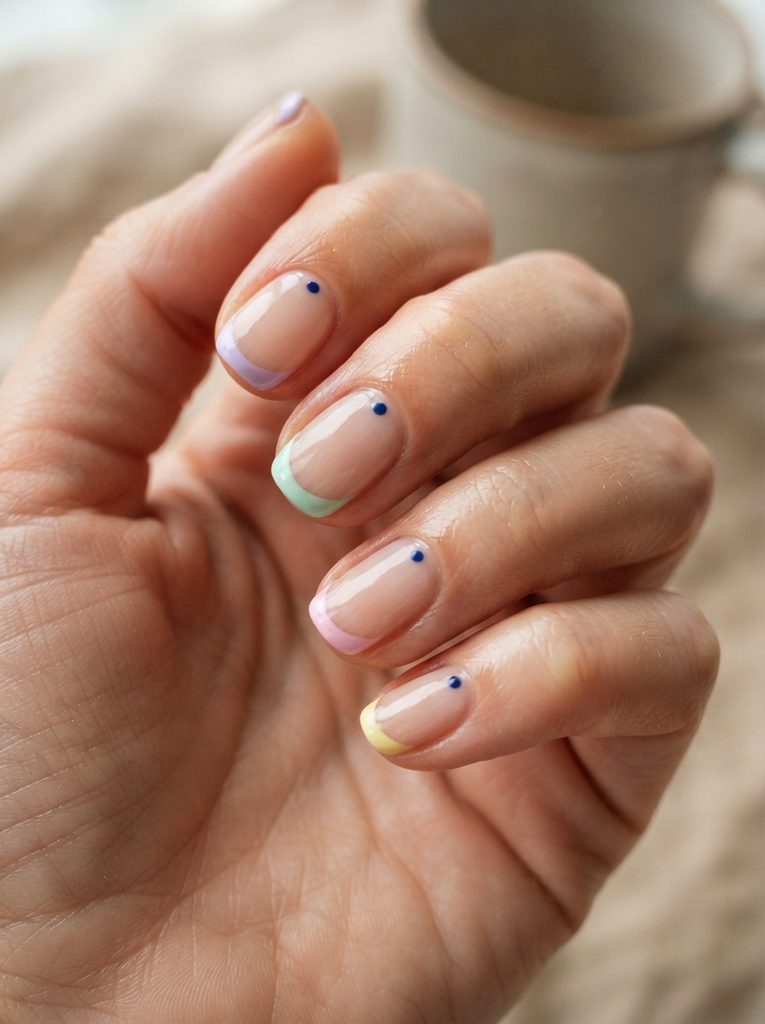
Combine two beginner techniques by adding tiny dots along a simple French tip. Start with a sheer nude or pink base and paint a narrow colored tip.
Once the tip has dried, use a small dotting tool to add tiny contrasting dots along the edge. White dots on pink tips, burgundy dots on cream, or gold dots on beige are easy combinations.
The design looks more detailed than a standard French manicure but still requires only basic dotting skills.
Use Less Polish
A dotting tool covered in too much polish can create oversized circles. Wipe away excess before touching the nail.
For another easy-to-style beauty look for everyday routines, you can also explore Summer Hairstyles for College.
20. One Chrome Accent Nail
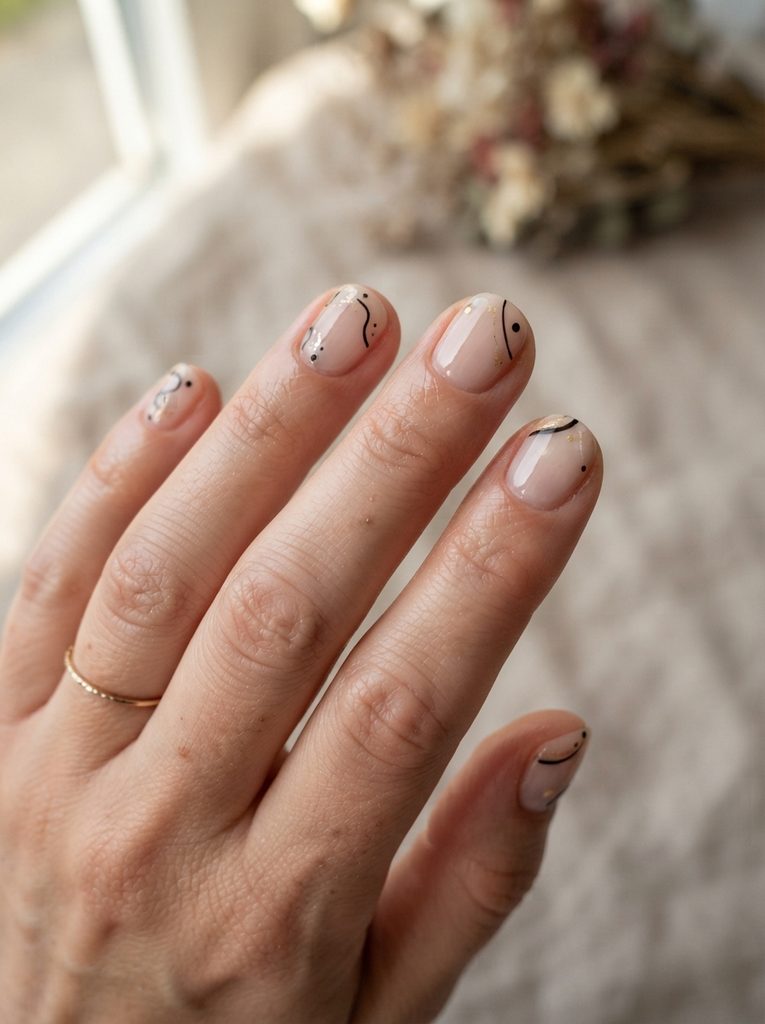
You don’t have to commit to a full chrome manicure to get a reflective finish. Paint four nails in nude, blush, cream, or another neutral shade and use chrome or metallic polish on one accent nail.
Silver works nicely with cool pinks, lavender, pale blue, and white. Gold tends to pair naturally with beige, brown, peach, and warm nude shades.
This approach is especially beginner-friendly because you only need to get one accent nail looking perfect.
Metallic Polish Is Enough
If you don’t own chrome powder or professional nail-art equipment, a good metallic polish can give you the same general idea with a much simpler application.
21. Minimalist Abstract Accent Nails
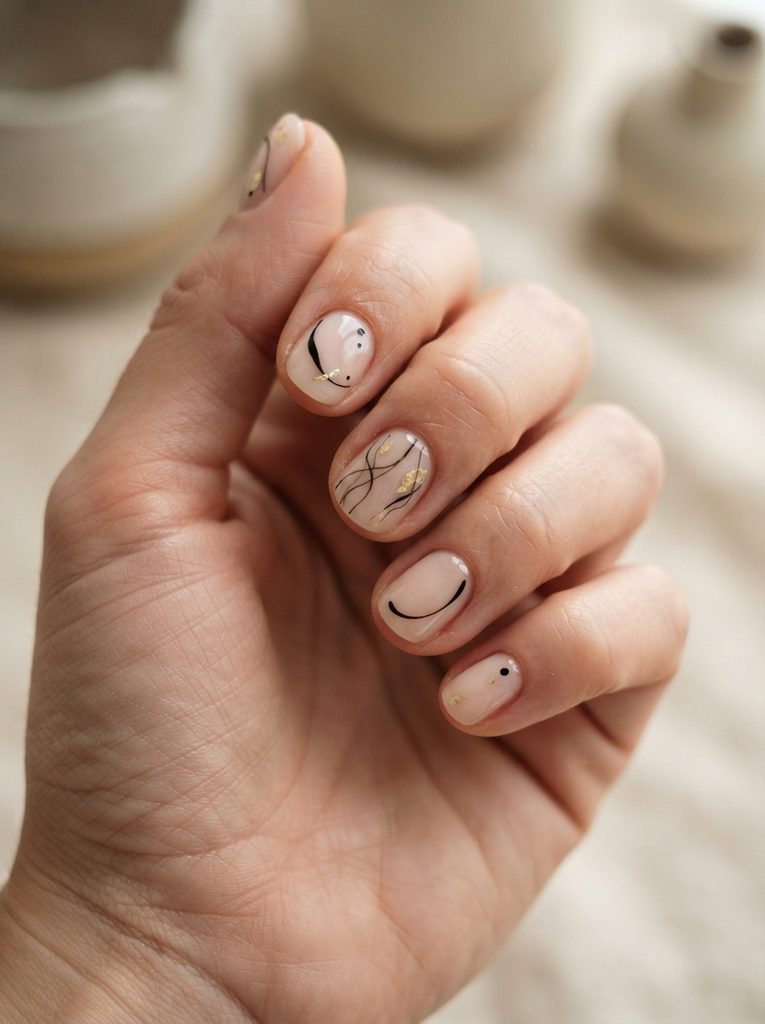
Abstract nail art is ideal when you don’t want to worry about perfect symmetry. Start with a nude, milky white, or pale pink base and add one or two simple details.
You could paint a thin black curve, a tiny dot, a short gold line, or a small color block. Keep the artwork on one or two nails and leave the others plain.
The result feels creative without requiring the precision of detailed illustrations. It’s also easy to personalize because you can change the colors and shapes according to your outfit or mood.
Let the Empty Space Work
Minimalist nail art looks best when the design has room around it. You don’t need to fill every part of a short nail.
If you’re putting together a complete look for a formal occasion, you can coordinate the manicure with Bridesmaid Hairstyles for Long Hair for a consistent beauty direction.
How to Prepare Short Nails Before Painting
The finished design will look much cleaner when the nails are prepared properly. Remove old polish, wash your hands, and dry the nails completely before you begin.
Use a nail file to smooth rough edges and create a consistent shape. You don’t need to make every nail perfectly identical, but keeping the lengths reasonably even makes the final manicure look more polished.
A base coat can provide a smoother surface for polish. It is also worth keeping the polish off the surrounding skin as much as possible because flooding the cuticle area can make a home manicure look messy.
The American Academy of Dermatology recommends keeping nails clean and dry, filing rough edges, and moisturizing the nails and surrounding skin as part of basic nail care.
Simple Beginner Kit
You don’t need a large collection of professional tools. Start with:
- Base coat
- Top coat
- Nail file
- Two to five polish colors
- Fine nail-art brush
- Dotting tool or toothpick
- Small cleanup brush
- Nail polish remover
- Cuticle oil
Once you’re comfortable with basic designs, you can gradually add tools that make specific techniques easier.
Choose the Right Design for Your Nail Shape
Your nail shape can influence how a design looks.
Short square nails: Thin French tips, checkerboard accents, straight lines, and geometric details can complement the defined edges.
Squoval nails: This shape is versatile and works well with French tips, dots, flowers, and minimalist designs.
Rounded nails: Curved French tips, half-moons, tiny flowers, and soft abstract lines work naturally with the rounded edge.
Very short nails: Focus on micro-dots, tiny hearts, sheer colors, small accents, and minimalist lines instead of large artwork.
The goal isn’t to make short nails look artificially longer. A design that fits the actual nail usually looks more balanced.
Beginner Mistakes That Can Ruin Nail Art
Applying Thick Polish
Thick layers are harder to control and take longer to dry. They can also make small nail-art details look raised or uneven.
Use thin coats and allow enough drying time between them.
Making the Design Too Large
Short nails have limited space. A large flower or oversized geometric pattern can quickly make the nail look crowded.
Start smaller than you think you need. You can always add another detail.
Skipping the Base Coat
A base coat can help create a smoother surface for your manicure. It can also be useful when working with strongly pigmented shades.
Touching the Nails Too Soon
A manicure can feel dry on the surface while the layers underneath are still soft. Give each layer enough time to set according to the polish instructions.
Using Too Many Colors
A beginner manicure doesn’t need six or seven shades. Two or three coordinated colors are often enough to create a polished set.
Ignoring the Natural Nail Shape
Don’t force a design onto a nail shape where it doesn’t fit. Adjust the size and direction of the artwork according to your actual nail.
How to Make Short Nail Designs Last Longer
Start with clean, dry nails and apply your polish in thin layers. Finish with a top coat and lightly cover the free edge of the nail.
Try to avoid immediately doing activities that involve prolonged contact with water while the manicure is setting. When doing dishes or using household cleaning products, wearing gloves can reduce direct exposure to water and chemicals.
If the manicure begins losing shine after a few days, another thin layer of top coat can refresh the surface.
You don’t always need to remove the whole manicure when one nail chips. Smooth the damaged area carefully and touch up the affected section if the rest of the manicure still looks good.
How to Make Beginner Nail Art Look More Professional
Clean edges make a bigger difference than complicated artwork.
After painting, use a small angled brush dipped lightly in nail-polish remover to clean polish from the skin around the nail. Do this carefully rather than repeatedly touching the actual manicure.
Keep the amount of polish on your brush under control. When you’re painting tiny details, too much polish can turn a delicate dot into a blob or a thin line into a thick stripe.
Finally, take your time. A simple design applied neatly usually looks better than an ambitious design that was rushed.
Easy Short Nail Designs for Different Occasions
For everyday wear, sheer pink, glossy nude, milky white, micro-French, and tiny dots are easy choices.
For school or college, try pastel French tips, small flowers, colorful dots, or minimalist lines.
For a date night, burgundy hearts, chrome accents, gold lines, or glossy chocolate tones can add more personality.
For graduation, a clean French manicure, nude base with gold details, or tiny accent designs can complement a dress without competing with it. Pairing your manicure with Graduation Hairstyles Ideas can help create a coordinated overall look.
For weddings, sheer pink, milky white, pearl-inspired details, micro-French tips, and delicate floral accents are easy directions to consider.
FAQs About Short Nail Designs for Beginners
What is the easiest nail design for beginners?
Tiny dots, sheer polish, micro-French tips, and simple lines are among the easiest designs to start with. They require basic tools and don’t depend on advanced painting skills.
Can I do nail art on very short natural nails?
Yes. Short natural nails can work well with minimalist designs such as dots, tiny flowers, micro-French tips, small hearts, half-moons, and short abstract lines.
Do I need acrylic nails for these designs?
No. These ideas are designed with short natural nails in mind. Extensions are not necessary.
What tools should a beginner use for nail art?
A base coat, top coat, nail file, a few polish colors, a fine brush, and a dotting tool are enough for many beginner designs. A toothpick can also be useful for very small details.
How do I make short nail polish last longer?
Apply thin coats, use a top coat, lightly seal the free edge, allow enough drying time, and use gloves when doing chores involving prolonged contact with water or cleaning products.
How long should I wait between coats?
Follow the drying guidance for your specific polish. Applying another layer while the previous one is still soft can cause dragging, dents, and uneven coverage.
What nail shape is best for short nails?
There isn’t one universal best shape. Squoval, square, and rounded shapes can all work well. Choose the shape that suits your natural nail and the amount of length you have.
How can I make short nails look longer?
A thin vertical detail, narrow French tip, sheer nude color, or negative-space design can create a visually elongated effect. You don’t need to physically add length to create that impression.
Are short nails easier for beginners?
They can be easier because there is less surface to cover and many minimalist designs work naturally on a smaller canvas. The main challenge is keeping tiny details controlled.
Final Thoughts
The best short nail designs for beginners aren’t necessarily the most complicated ones. A sheer pink manicure, micro-French tip, tiny flower, small heart, dot pattern, or single metallic accent can look polished without requiring professional-level skills.
Start with one technique and repeat it until your hand feels comfortable. Dots are a good first step, followed by simple lines, French tips, and tiny shapes. Once you have better control, you can combine techniques to create more personal designs.
Short natural nails also give you plenty of freedom to experiment. You can change colors with the season, coordinate your manicure with an outfit, or keep things simple when you want an understated look.
Most importantly, don’t judge your first attempt against a salon-perfect photograph. Nail art takes hand control and repetition. A neat, simple manicure that you can confidently recreate yourself is a much better starting point than an elaborate design that leaves you frustrated.
3 Comments