
How to Do a French Braid: Easy Step-by-Step Guide for Beginners
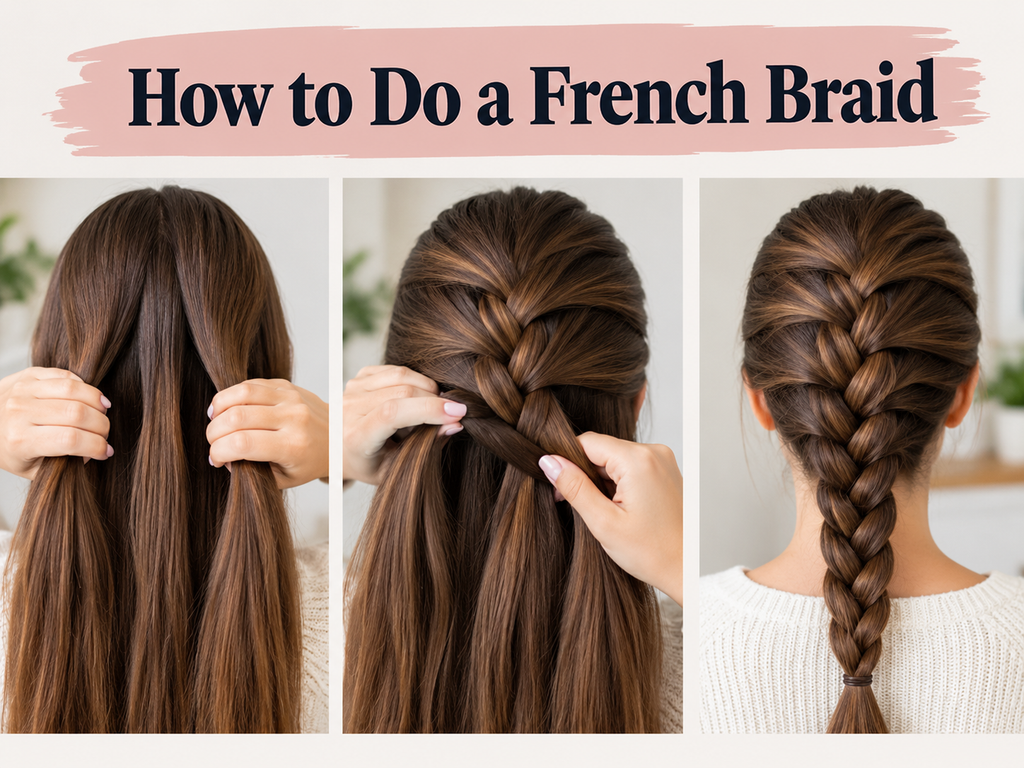
Learning how to do a French braid becomes much easier when you stop thinking of it as one complicated hairstyle and break it into a repeating pattern. You start with three sections, cross the outside pieces over the middle, and add a little more hair to each outside section before crossing it again.
That basic movement is what creates the woven look of a French braid. Once your hands get used to the rhythm, you can use the same technique for a classic single braid, double French braids, half-up styles, side braids, and more. Current professional tutorials follow this same basic sequence: detangle the hair, create three sections, begin a regular braid, gradually add hair from each side, then finish with a standard three-strand braid.
If you’re a complete beginner, don’t worry if your first attempt looks uneven. The goal is to understand the movement first. Neatness and speed come with practice.
What You Need Before You Start
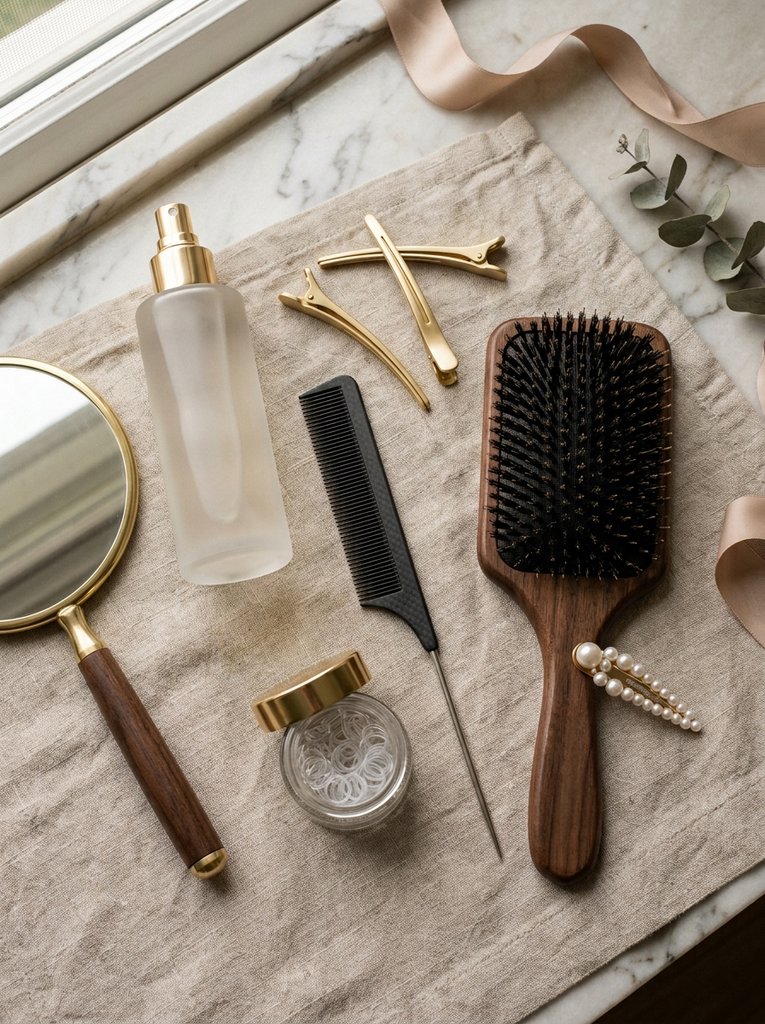
You don’t need a large collection of styling tools to make a French braid. Having the right basics nearby simply makes the process easier.
You’ll need:
- A paddle brush or detangling brush
- A rat-tail or fine-tooth comb
- A small hair elastic
- Sectioning clips if you have thick or layered hair
- A handheld mirror if you’re braiding your own hair
- Optional texture spray for very smooth or slippery hair
- Optional lightweight hairspray for finishing
Start with completely detangled hair. If your hair is extremely clean and slippery, a small amount of texture product can give your fingers more grip. You don’t need to overload the hair with product.
Set Up Your Mirror
If you’re learning on yourself, stand in front of a large mirror and keep a handheld mirror nearby. At first, use the mirrors to check your progress rather than trying to watch every movement. Looking at the braid constantly can actually make the hand movements more confusing because you’re working with a reversed image.
Step 1. Detangle Your Hair Completely

Start by brushing through your hair until you can move the brush from the roots toward the ends without hitting obvious knots. Pay particular attention to the back of your head because tangles there can become difficult to manage once you begin braiding.
If your ends are tangled, work upward from the ends rather than repeatedly pulling a brush through the entire length. A smooth starting point makes it easier to pick up clean sections as you work.
You don’t necessarily need freshly washed hair. Slightly textured hair can sometimes be easier to control than extremely silky hair, especially when you’re learning.
Don’t Skip This Part
A few minutes of careful detangling can save you from stopping halfway through the braid to pull apart a knot.
Step 2. Create the Starting Section
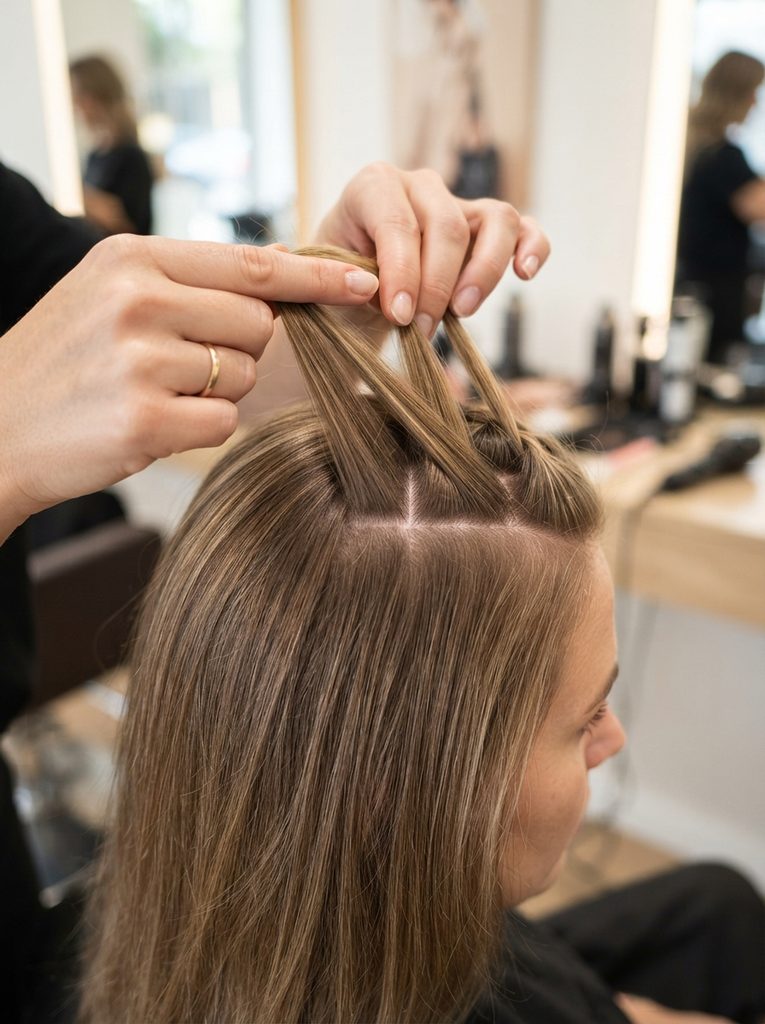
Gather a section of hair from the crown area. A simple way to find it is to take hair from around the upper sides of your head and bring it toward the center.
The starting section should contain enough hair to create three manageable strands, but it shouldn’t be so large that you lose control. Separate it into a left, center, and right section.
For a beginner, keeping the starting section relatively even is more important than making it perfectly shaped.
Start Where You Can See
If you’re learning on someone else, the crown is easy to work from. If you’re braiding your own hair, starting slightly closer to the top of your head can make the first few movements easier to control.
Step 3. Divide the Hair Into Three Strands
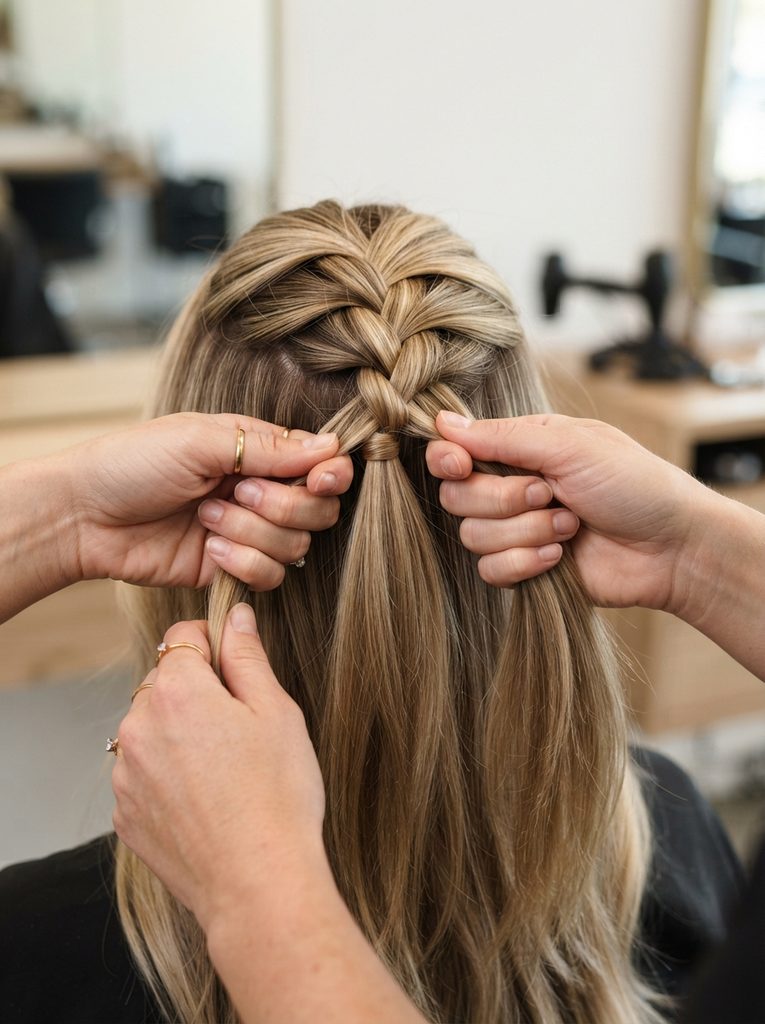
Separate the starting section into three approximately equal pieces.
Think of them as:
Left | Center | Right
Try to keep the strands distinct in your fingers. If they become mixed together, pause and separate them again before continuing.
You don’t have to obsess over perfectly identical thickness. What matters is that the three strands are easy to identify and that you can repeatedly move the outside strand over the center.
Give Each Strand a Job
When you’re learning, mentally label the strands instead of trying to remember complicated finger positions. Your left strand will move toward the middle, then your right strand will move toward the middle.
This simple rhythm makes the technique easier to understand.
Step 4. Make the First Two Crossovers
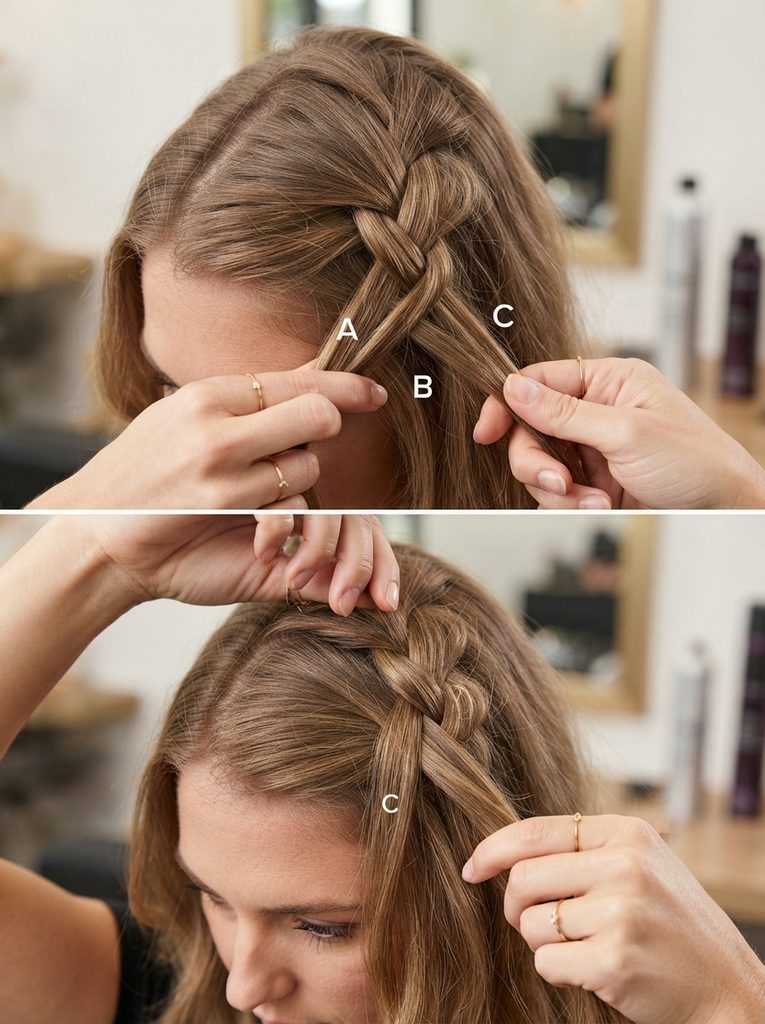
Before adding any new hair, begin the braid like a normal three-strand braid.
Take the left strand and cross it over the center.
Then take the right strand and cross it over the new center strand.
You have now created the first basic stitches of the braid. This gives you an anchor before you start incorporating additional hair.
The key is to understand what happens after each crossover. The strand you moved becomes part of the middle, while the former middle strand moves to the outside.
Keep the Movement Simple
Don’t worry about making the braid tight yet. Focus on learning the sequence:
Left over center → Right over center
Once this feels natural, adding hair becomes much easier.
Step 5. Add a Small Section From the Right
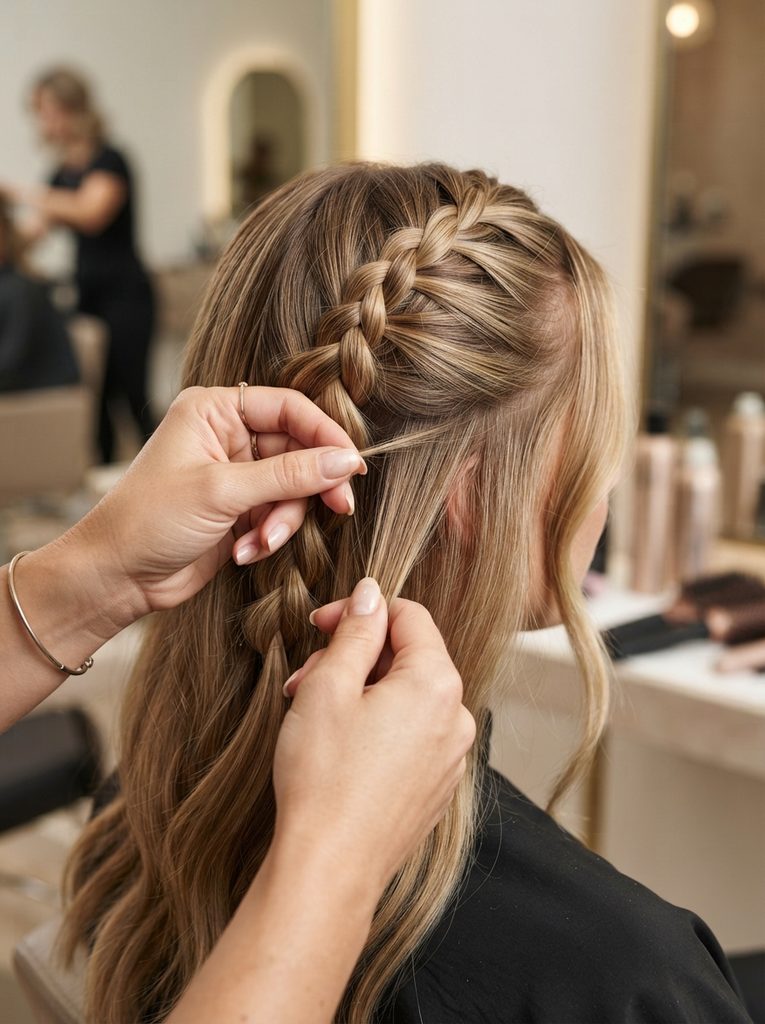
Now the technique changes from a regular braid into a French braid.
Take a small section of loose hair from the right side of your head. Combine that new section with the existing right strand.
You now have a slightly larger right strand. Cross that combined section over the center.
The important part is to add the new hair before making the crossover. This is the movement that gradually incorporates the loose hair into the braid.
Take Smaller Sections at First
If you’re struggling to control the braid, use smaller additions. Large chunks can make the braid uneven and make it harder to maintain the pattern.
Step 6. Add a Matching Section From the Left
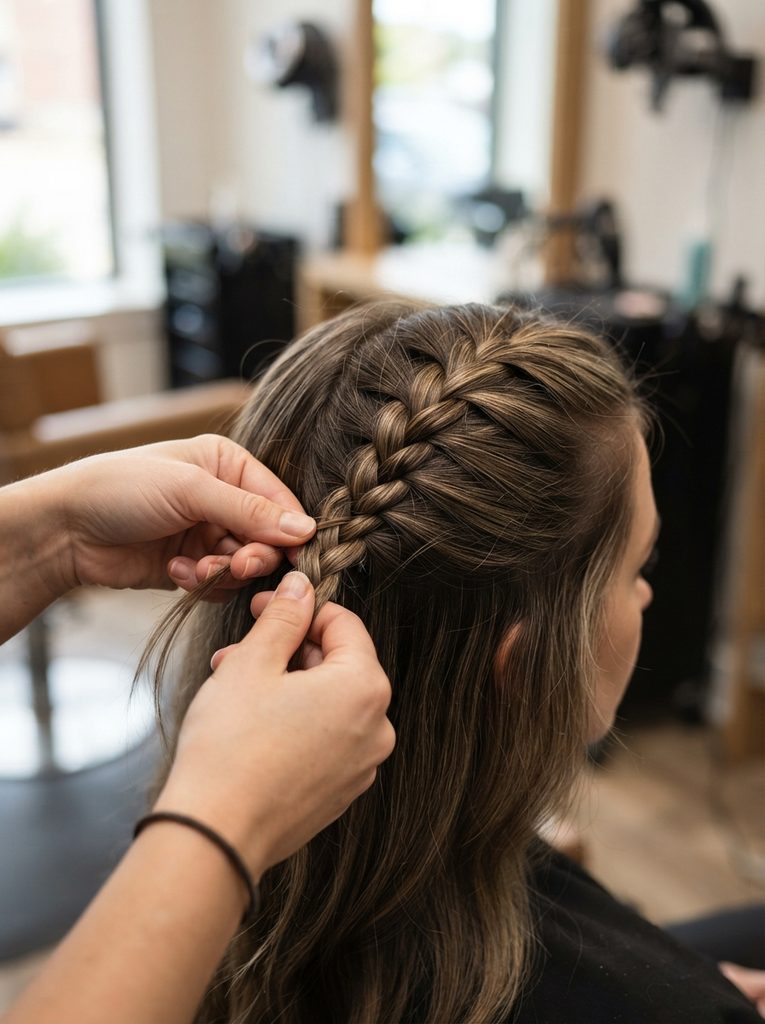
Now repeat the same movement on the opposite side.
Pick up a small section of loose hair from the left side and combine it with the existing left strand. Then cross the larger left strand over the center.
Your rhythm is now:
Add right → cross right over center → add left → cross left over center
Continue repeating those movements.
Match the Amounts
You don’t need a measuring tool, but try to take roughly similar amounts from both sides. If you consistently take much more hair from one side, the braid may start pulling toward that direction or look noticeably fuller on one side.
Step 7. Keep Adding Hair Down the Back of Your Head
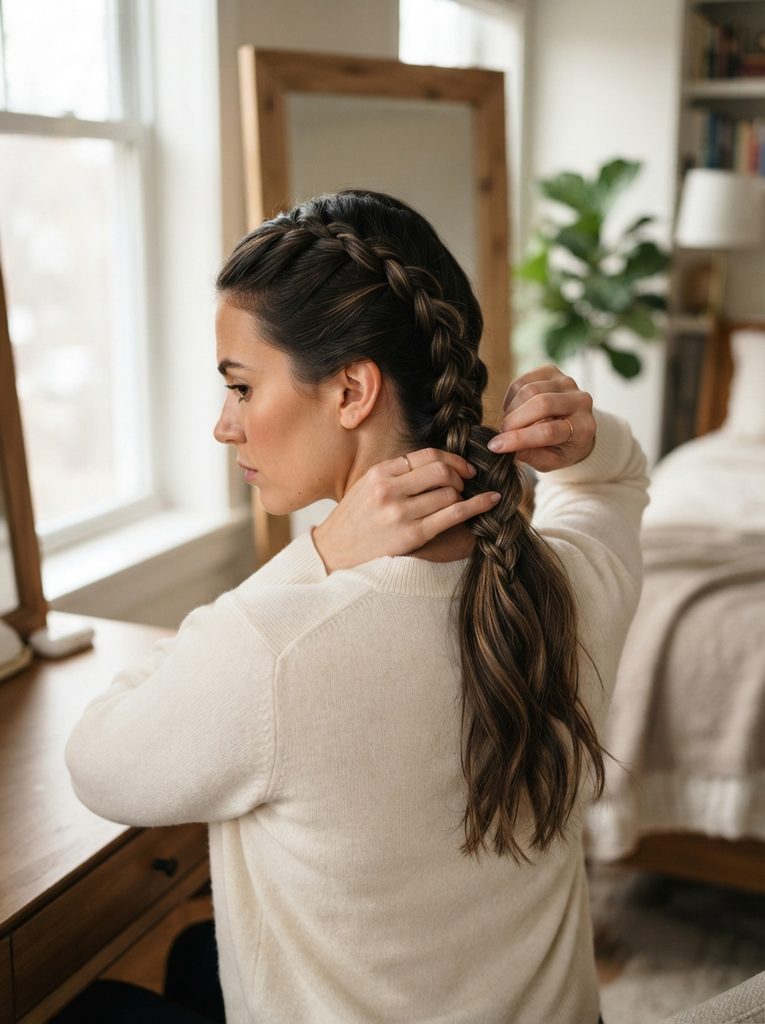
Continue alternating sides as you move toward the nape.
Each cycle follows the same pattern:
- Add hair to the right strand.
- Cross the right strand over the center.
- Add hair to the left strand.
- Cross the left strand over the center.
As you work lower, there will be less loose hair available on either side. Keep your hands relatively close to your head so the braid stays controlled.
When you reach the nape and all the loose hair has been incorporated, you’ve completed the French-braiding portion.
Slow Down at the Back
The back of the head is where beginners often lose their section sizes. Take your time and feel for the next section with your fingers rather than rushing to finish.
If you need a second mirror, use it briefly to check whether the braid is centered.
Step 8. Switch Back to a Regular Three-Strand Braid
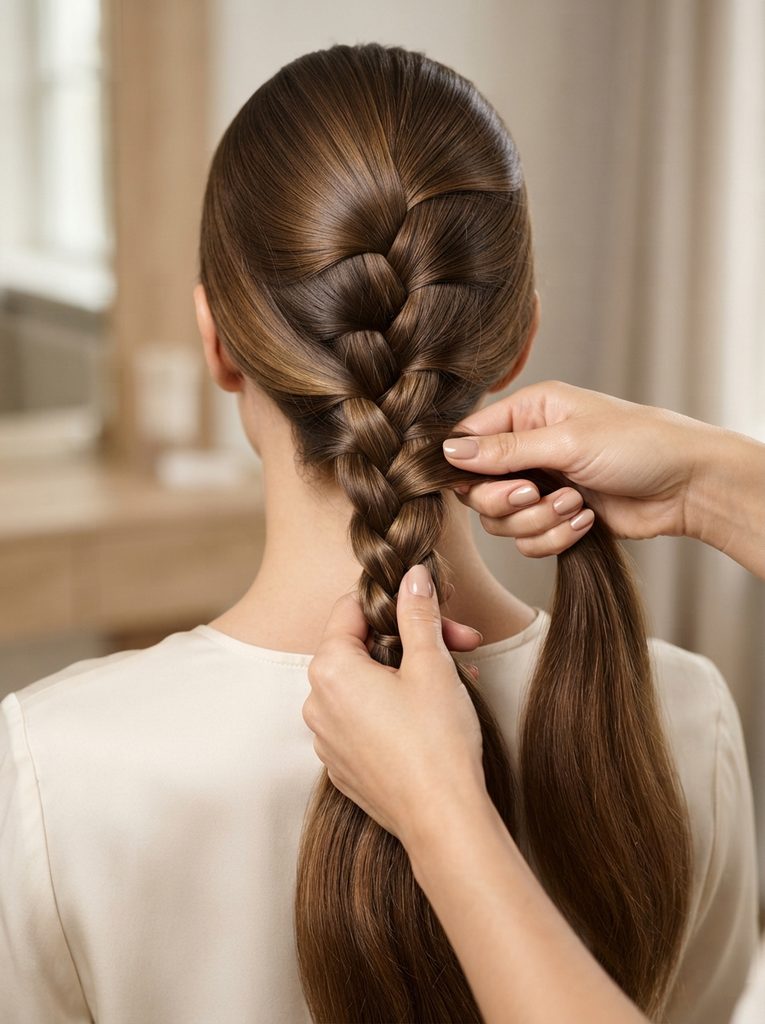
Once all the loose hair has been incorporated, stop adding new sections.
From this point, simply continue with a normal three-strand braid down the remaining length:
Left over center → Right over center → repeat.
Continue until you are a few inches from the ends, depending on how much length you want to leave loose.
Secure the braid with a small elastic.
This transition is completely normal. A French braid only requires added hair while loose hair remains available around the head. Once you’ve reached the nape, the remaining length is finished like an ordinary braid.
Keep the Ends Secure
Don’t tie the elastic too close to the very tips if your hair is prone to slipping out. Leaving a little length below the elastic usually gives the finished braid a cleaner appearance.
Step 9. Loosen the Braid for a Softer Finish

Your French braid is technically finished once it is secured, but you can change its appearance with a few small adjustments.
For a neat everyday style, leave the braid compact and smooth.
For a fuller, more relaxed look, gently tug the outer edges of a few braid sections. This technique is often called pancaking. Use light pressure rather than pulling aggressively, because too much manipulation can loosen the braid.
You can also release a couple of small pieces around your face if you want a softer finish.
Decide the Finish Before Pulling
If you’re wearing the braid for school, work, exercise, or a busy day, keeping it relatively compact may help it stay secure.
For a casual or romantic hairstyle, a little extra volume can make the braid look softer.
The French Braid Pattern to Memorize
If the full tutorial feels like too much information, remember just one repeating sequence:
Add hair → cross over center → switch sides → add hair → cross over center.
That’s the entire technique.
The most important difference between a traditional three-strand braid and a French braid is that you continuously incorporate additional hair as you work downward. Once there is no loose hair left to add, you return to the regular three-strand pattern.
Think of it as two separate stages:
Crown to nape: Add hair while braiding.
Nape to ends: Braid normally.
This makes the process much easier to remember.
How to French Braid Your Own Hair
Braiding your own hair is harder initially because you cannot easily see the back of your head and your hands have to work behind you.
Start by practicing the basic three-strand movement on your own hair. Once that feels comfortable, practice adding small sections from each side.
Keep your elbows lifted enough to maintain control, but don’t hold your arms rigidly. If your shoulders become tired, stop and reset rather than trying to finish while your hands are losing coordination.
A handheld mirror can help you check your progress, but don’t rely on watching every crossover. Over time, your fingers will learn the movement through repetition.
Practice the Motion First
Before trying to create a perfect braid, practice this sequence several times:
Right over center.
Left over center.
Add hair to right.
Right over center.
Add hair to left.
Left over center.
Once your hands understand that rhythm, the complete hairstyle becomes much less intimidating.
Common French Braid Mistakes Beginners Make
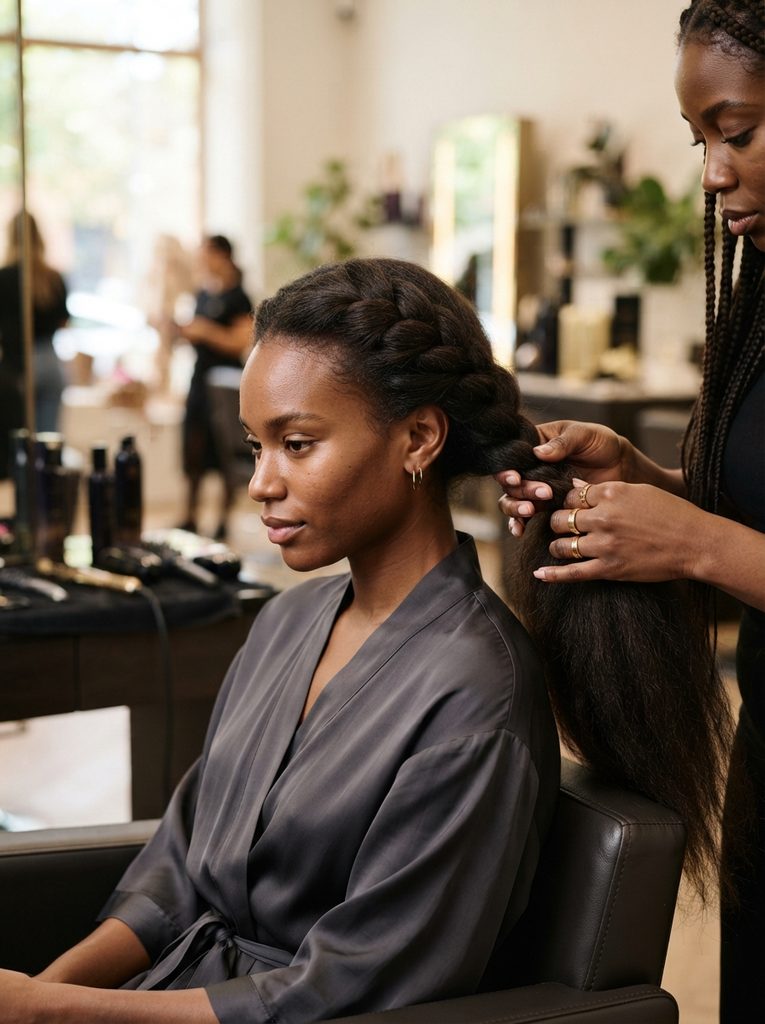
If your first few attempts don’t look right, you’re probably making one of these common mistakes:
Taking sections that are too large: Smaller additions give you better control.
Changing the amount of hair: Try to keep the additions reasonably similar on both sides.
Losing the center strand: Pause and separate the three strands whenever they become confusing.
Pulling too tightly: Firm control is useful, but the braid should not cause pain or excessive tension.
Braiding too quickly: Speed makes it harder to notice when your sections are becoming uneven.
Starting with tangled hair: Knots can interrupt the movement and make the braid look messy.
Watching the mirror constantly: A reversed image can make simple hand movements feel more confusing when you’re still learning.
Fix One Problem at a Time
Don’t try to correct everything during one practice session. If your sections are uneven, focus on section size. Once that improves, work on tension. Then work on speed.
This makes progress much easier to track.
How to French Braid Thick Hair
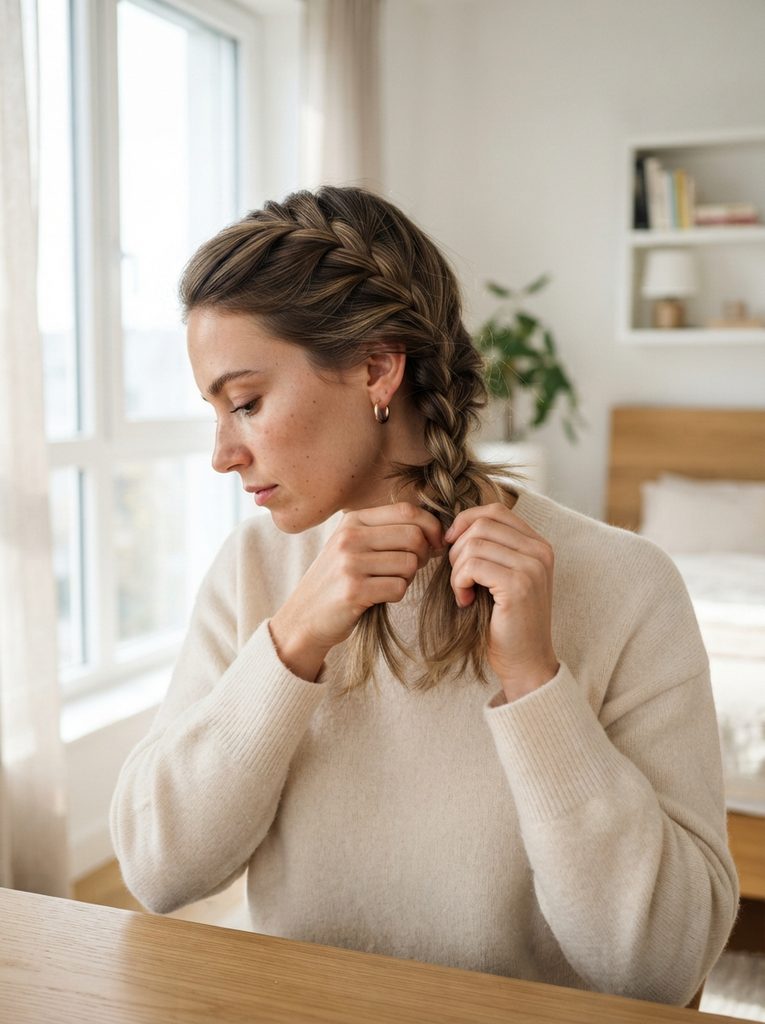
Thick hair can actually produce a beautiful, full French braid, but managing the amount of hair can feel difficult when you’re learning. The key is to avoid grabbing huge sections simply because you have plenty of hair available.
Start with a manageable crown section and keep the added pieces relatively consistent as you work down. If the loose hair becomes difficult to control, use your free fingers to separate the next section before bringing it into the braid.
If your hair is particularly dense, you can also use sectioning clips to keep the hair you are not currently incorporating out of your hands.
Work in Smaller Sections
Smaller additions give you more control over thick hair and can create a more defined braid pattern. You may need a little extra time, but the finished result is usually worth it.
How to French Braid Short Hair

You don’t need waist-length hair to create a French braid. Shorter hair can work too, although layers and shorter pieces may make the braid harder to control.
Start higher on the head and keep your sections relatively small. As you move toward the nape, use your fingers to catch shorter pieces before they escape from the braid.
If a few pieces refuse to stay inside, don’t keep pulling them aggressively. A small amount of lightweight styling product or a discreet bobby pin can help secure them.
Watch the Ends
Short layers often fall out near the bottom of the braid. Leave enough length below the final crossover to secure the style comfortably with an elastic.
For more short-hair inspiration, see Homecoming Hairstyles for Short Hair.
How to French Braid Curly or Wavy Hair
Curly and wavy hair can create a beautiful textured French braid because the natural pattern adds volume and dimension. However, detangling and section control need a little more attention.
Work with your natural texture rather than trying to make every strand perfectly smooth. Detangle gently first, then separate the hair with your fingers or a suitable brush depending on your curl pattern and normal hair-care routine.
If you want the finished braid to look softer, allow a few natural curls to remain around the face instead of forcing everything into the braid.
Don’t Chase Every Flyaway
A French braid does not need to look completely flat to look polished. A little natural texture can make the finished hairstyle feel softer and more relaxed.
How to Keep a French Braid Neat All Day
A neat French braid starts with controlled sectioning, but finishing products can also help. Once the braid is complete, gently smooth obvious flyaways with a small amount of lightweight product.
Avoid repeatedly touching the braid throughout the day. Every time you pull apart the sections or run your fingers through the style, you can gradually loosen the structure.
For a softer hairstyle, intentionally loosen only a few sections immediately after braiding rather than waiting until the braid has already become messy.
Use Flexible Hold
If you need extra hold, choose a lightweight hairspray or styling product that allows some movement. A completely stiff braid can look less natural and may be uncomfortable to adjust later.
How to Make a French Braid Look Fuller
If your braid looks thin compared with the amount of hair you started with, gently loosen the outer edges after securing it.
Pull the braid apart a little at a time. Start near the top and work downward, checking the shape as you go. You can stop as soon as the braid reaches the fullness you want.
This works especially well for casual and romantic hairstyles. For a more polished school, work, or formal look, keep the sections closer together.
Pull Out, Don’t Pull Down
When creating volume, gently pull the outer loops sideways rather than tugging the entire braid downward. This gives the braid more width without completely disturbing its structure.
French Braid vs. Dutch Braid
The biggest difference is the direction in which the outside sections cross the middle.
In a French braid, the outside strand crosses over the center while you gradually add hair.
In a Dutch braid, the outside strand crosses under the center. Because of this difference, a Dutch braid generally appears more raised from the surface of the head.
The two techniques use a similar adding-hair process, so learning one can make learning the other much easier.
Learn the French Version First
If you’re completely new to braiding, concentrate on the French braid movement before trying to reverse the crossover direction. Once your hands understand the three-section rhythm, the Dutch technique becomes easier to practice.
How to Do Two French Braids
Two French braids use the same basic technique as one braid, but you divide the hair into two larger sections first.
Create a center part from the forehead to the nape. Clip one side out of the way, then begin French braiding the other side from the crown.
Follow the same pattern of adding small sections and crossing them over the center. Secure the first braid before repeating the process on the opposite side.
Make the Center Part Clean
A straight center part makes the two braids look balanced. Use a fine-tooth comb if necessary, and check the part from the front and back before starting.
How to Do a Half-Up French Braid
A half-up French braid is a useful option when you want the detail of a braid without incorporating all of your hair.
Start at the crown and create your three sections as usual. Continue adding hair from the sides, but stop once you reach the point where you want the braid to end.
Secure it with a small elastic and leave the remaining hair loose.
This can create a romantic everyday hairstyle, especially when the loose hair is left naturally wavy or softly curled.
For more half-up hairstyle inspiration, see Half-Up Half-Down Homecoming Hairstyles.
Choose Your Stopping Point
Stopping higher on the back of the head creates a more obvious half-up look. Continuing slightly farther down creates a longer braided section with less loose hair at the crown.
How to Do a Side French Braid
A side French braid starts away from the center of the head and follows the shape of the side toward the opposite shoulder or behind the ear.
Begin with three sections near the side part. Add hair from the surrounding area as you work diagonally across the head.
This style can feel more relaxed than a traditional centered French braid and works well when you want your hairstyle to have an asymmetrical shape.
Follow the Natural Direction
Don’t force the braid into a perfectly straight path. Let it follow the curve of the head toward the side where you want the finished braid to sit.
What to Do When Your French Braid Looks Uneven
An uneven braid doesn’t always mean you need to start over.
First, identify where the imbalance begins. If one side becomes thicker around the middle, use slightly smaller additions from that side during the next few crossovers.
If the entire braid is leaning to one side, check whether you’re consistently pulling one side tighter or picking up larger sections from that direction.
Fix It While You Go
The easiest time to correct an uneven braid is immediately after you notice it. Continuing for another several inches makes the problem harder to disguise.
What to Do When Hair Keeps Falling Out
Short layers, bangs, very silky hair, and heavily textured hair can all make certain sections harder to keep inside the braid.
Instead of pulling harder, try taking a slightly smaller section and incorporating it during the next crossover. You can also use a small amount of styling product to improve grip.
For tiny pieces that still escape, discreet bobby pins can provide a quick finishing solution.
Don’t Chase Every Strand
Trying to force every tiny hair into the braid can make the hairstyle look overly tight. A few loose strands are normal and can even make the finished style look softer.
How Long Does It Take to Learn a French Braid?
The basic movement can be understood quickly, but creating a neat braid on yourself takes practice.
Your first attempts may take considerably longer because you are thinking about every hand movement. After repeating the sequence, your fingers gradually begin to recognize the pattern without conscious effort.
Instead of trying to master everything in one session, practice for a few minutes at a time.
Focus on One Skill
One day, practice sectioning. Another day, practice adding hair. Then work on maintaining even tension. Breaking the skill into smaller parts makes learning much less frustrating.
A Simple French Braid Practice Routine
If you’re serious about learning, use the same sequence every time you practice.
Practice 1: Separate three equal strands.
Practice 2: Repeat the basic over-center movement.
Practice 3: Add hair from one side.
Practice 4: Alternate both sides.
Practice 5: Complete a full braid.
Practice 6: Work on cleaner sections and consistent tension.
Practice 7: Try braiding without constantly watching the mirror.
You don’t need a full hour every day. Short, focused practice can help your hands become familiar with the movement.
Practice When You’re Not Rushing
Avoid learning five minutes before leaving for school, work, or an event. Give yourself enough time to stop, undo the braid, and try again.
French Braid Finishing Ideas
Once you’ve mastered the basic technique, you can change the overall appearance without changing the braiding method.
Try leaving the braid compact for a clean everyday look.
Gently loosen the edges for more volume.
Leave a few face-framing pieces loose for a romantic finish.
Add a ribbon around the elastic for a feminine detail.
Turn the finished braid into a low bun for a more polished hairstyle.
You can also use a decorative clip or accessory near the end of the braid.
For another simple way to change a finished hairstyle, explore Claw Clip Hairstyles.
Keep Accessories Light
If your braid is already detailed, one small accessory can be enough. Too many additions can hide the pattern you’ve spent time creating.
French Braid FAQ
Is a French braid hard to learn?
The technique can feel awkward at first, especially when you’re braiding your own hair. The movement becomes easier once you understand the repeating pattern of adding hair and crossing the outside strand over the center.
Should I French braid wet or dry hair?
Dry hair is usually easier for beginners to control, especially if freshly washed hair is very slippery. Your ideal starting texture also depends on your hair type and normal styling routine.
Why does my French braid keep coming loose?
The most common reasons are inconsistent tension, sections that are too large, or loose hair not being incorporated completely. Try smaller sections and keep your hands close to your head.
Why is my French braid crooked?
A crooked braid can happen when you take different amounts of hair from each side or pull one side more tightly. Check your section sizes as you move down and make small corrections early.
Can I French braid layered hair?
Yes. Layered hair can be French braided, although shorter pieces may escape. Smaller sections and a little styling product can help keep the layers controlled.
Can I French braid my own hair?
Yes. It takes more practice than braiding someone else’s hair because you cannot easily see the back of your head. Start slowly and use a large mirror until the hand movements become familiar.
How do I make a French braid look fuller?
After securing the braid, gently pull the outer edges of selected sections to widen them. Make small adjustments rather than pulling the entire braid apart.
What is the difference between a French braid and a Dutch braid?
A French braid crosses the outside sections over the center. A Dutch braid crosses them under the center, which gives the Dutch braid a more raised appearance.
Can I sleep with a French braid?
You can wear a comfortable French braid to bed, but avoid making it excessively tight. If the hairstyle causes pain or pulling, loosen or remove it.
Can French braids damage hair?
Any hairstyle that creates excessive or repeated tension can contribute to hair breakage or hair loss. Keep the braid comfortable, avoid pulling tightly around the hairline, and vary your hairstyles rather than repeatedly wearing high-tension styles.
Final Thoughts
Learning how to do a French braid is mostly about getting comfortable with one repeating movement. Start with three sections, cross the outside strands over the center, add a little loose hair before each crossover, and continue until you reach the nape. From there, finish with a regular three-strand braid.
Your first attempt may not look perfect, and that’s completely normal. Pay attention to section size, hand position, and tension rather than trying to create a flawless braid immediately. Once those movements become familiar, you’ll have a foundation for many other braided hairstyles.
The best way to improve is simple: practice regularly, slow down when a section becomes confusing, and make small corrections instead of starting over every time something looks slightly uneven.



One Comment